
Painted Ceramic Christmas Tree
Hey ya’ll, I don’t know about you but I am already feeling so festive! Did you see where I recently painted this adorable ceramic vintage Christmas tree on Facebook live? If you missed it, sign up to receive my text message notifications of when I go live on Facebook. Just text “hey” to (270) 207-9091 and we’ll get you signed up!
Now it’s time to get back to our ceramic Christmas trees! For many of us we have such fond memories of these small lit Christmas trees. They give me nostalgia for the times at grandma’s house around the holidays.
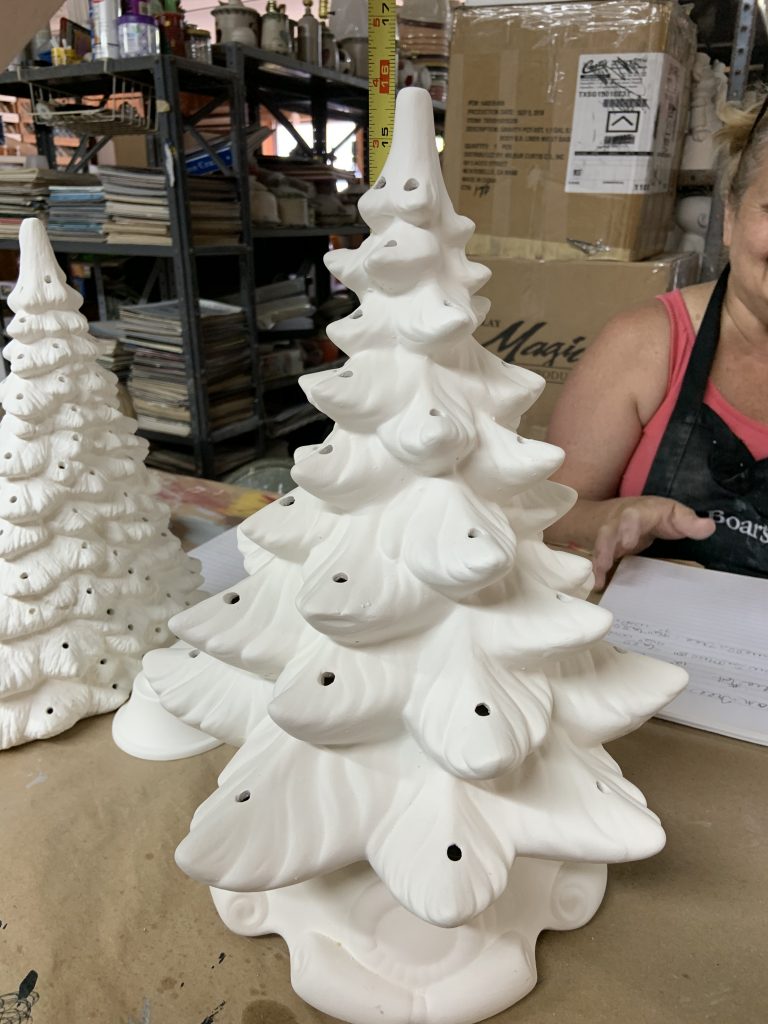
Although slightly different from the ones I remember growing up, I am loving these ceramic Christmas trees I have available in my shop! They are very thin, making them perfect for a mantle or window sill. I also have another Christmas tree option in my shop that isn’t as thin. Follow along with me as we paint one and get it ready for Christmas!
Supply List
- 2 inch Flat Tip Paint Brush
- 1 inch Flat Tip Brush
- Ceramic Christmas Tree (Slim)
- OR Ceramic Christmas Tree (Not Slim)
And DecoArt Matte Acrylic Americana Paints:
-
- Christmas Green
- Hauser Light Green
- Festive Green
- White
- DecorArt Clear Gloss Varnish Clearcoat
Note: Affiliate links included within this post for your convenience. As an Amazon Associate, I earn from qualifying purchases.
Behind the Scenes of the Ceramic Christmas Tree
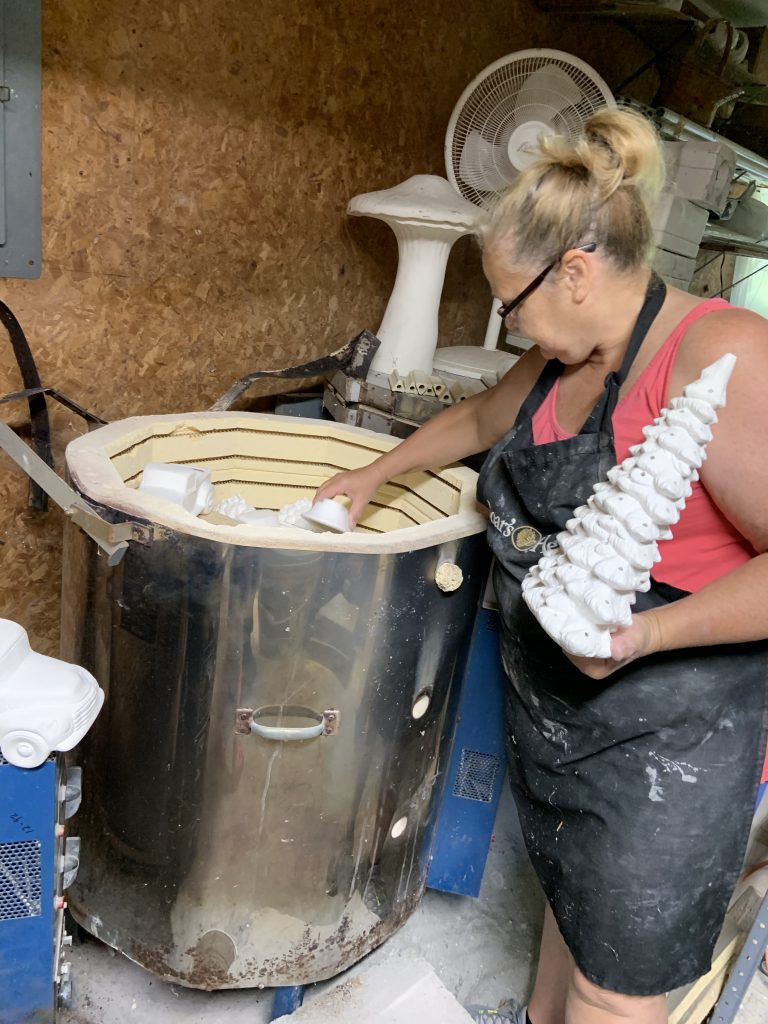
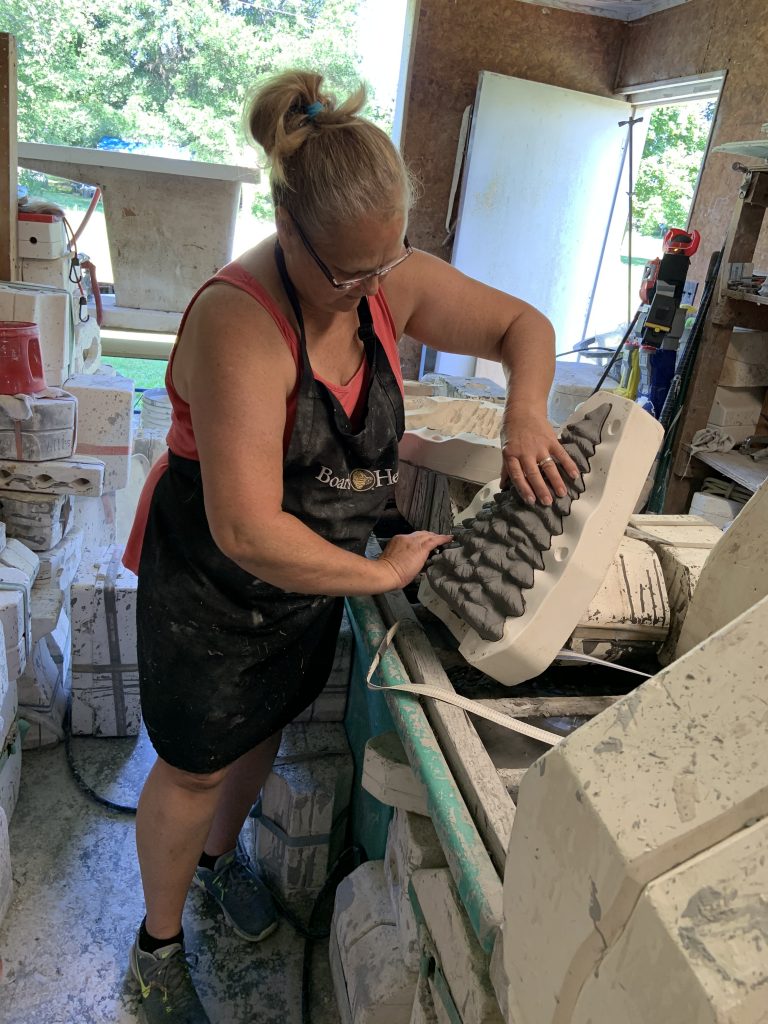
Before I even start painting this ceramic Christmas tree with you, I have to talk about where these trees are coming from.
I am so proud to be using a local Kentucky ceramic artist to create these ceramic trees. She provides me with all of my blank ceramic Christmas trees and other products to sell in my shop.
In addition to the amazing ceramic Christmas trees that she provides for us, she also makes the ceramic pickup truck and lids that are available in my shop. Our ceramic truck has additional pumpkin lids and Christmas tree lids that sit on the bed of the truck and can be purchased for even more festive ceramic decor.
Grab Your Supplies and You’re Ready to Go!
Now that you know how these ceramic Christmas trees are created, let’s get ready to paint them!
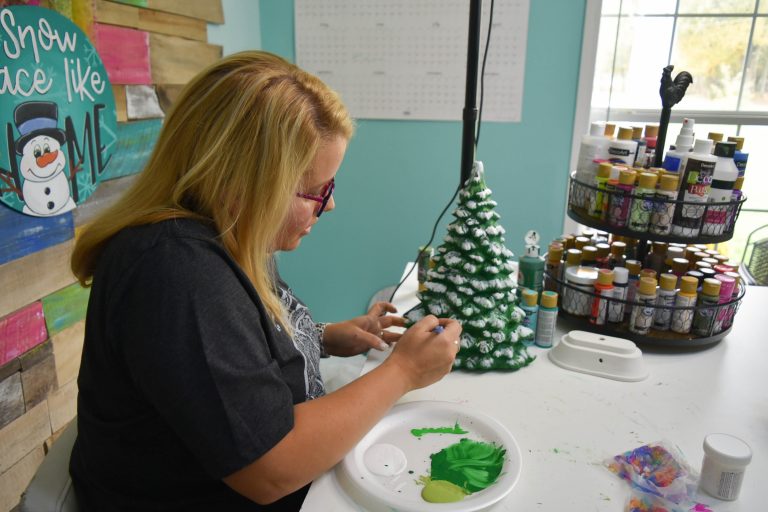
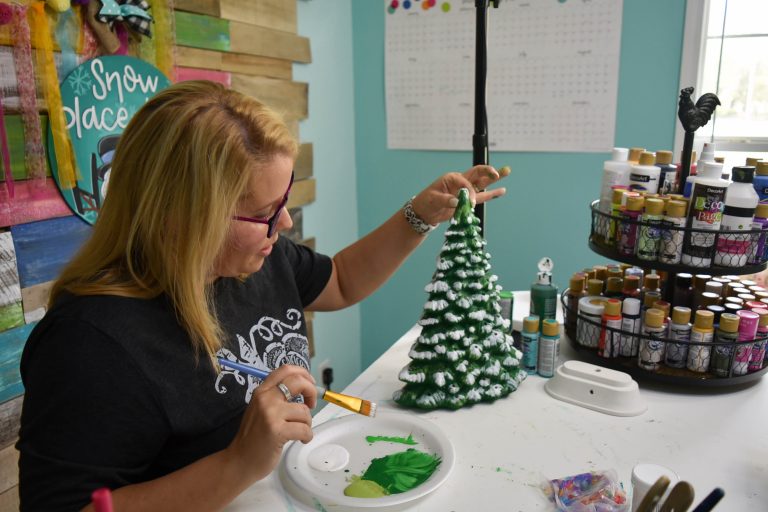
I love how simple these trees are to paint. This would be a great craft for the kiddos to do with you! I started by painting the entire tree green with a paint brush. Due to the different branches, you do have to poke into the crevices with your paint brush to cover all the white. You may want a smaller brush for that.
If you love learning how to make holiday decor, we’d love to have you be a part of our winter challenge. In our winter challenge you learn: how to use a template, how to cut your own door hanger, how to add lettering and shading, and how to create patterns on your door hanger.
It’s always a blast when we can paint and learn together, sign up for the challenge now and join in on the fun by visiting us at southernadoornmentsdecor.com.

Once I had my tree painted, I grabbed a lighter green paint (Hauser Light Green) and dabbed my larger paint brush with it. You can use a paper towel to wipe off the excess paint, then dry brush the tree to give it some different colors on the branches.
I repeated this same process once more with the Festive Green paint. I love this effect, the colors look so good together and give it more of an evergreen tree look.
Adding Some Finishing Touches to Our Ceramic Christmas Trees
Now it’s time to add some snow to our tree branches!
I decided that this Christmas tree just wouldn’t be complete without snow on the branches. I used a flat tip brush and white paint on the branches to paint the snow on.
TIP: Paint upward on your tree so you don’t forget about the snow on the bottom of your tree branches!
If you’re looking for a place to find more tips and techniques when painting, you’d love to join my Painter’s Clubhouse. It’s a sisterhood of painters that are growing from a beginner painter to a confident artist. You can join us there too – just head to my website and hop on the waitlist so that you’re notified the next time it opens up!
After the snow on my ceramic Christmas tree dried, I added a coat of DecoArt Clear Gloss Varnish. This helps to seal and protect your ceramic Christmas tree.
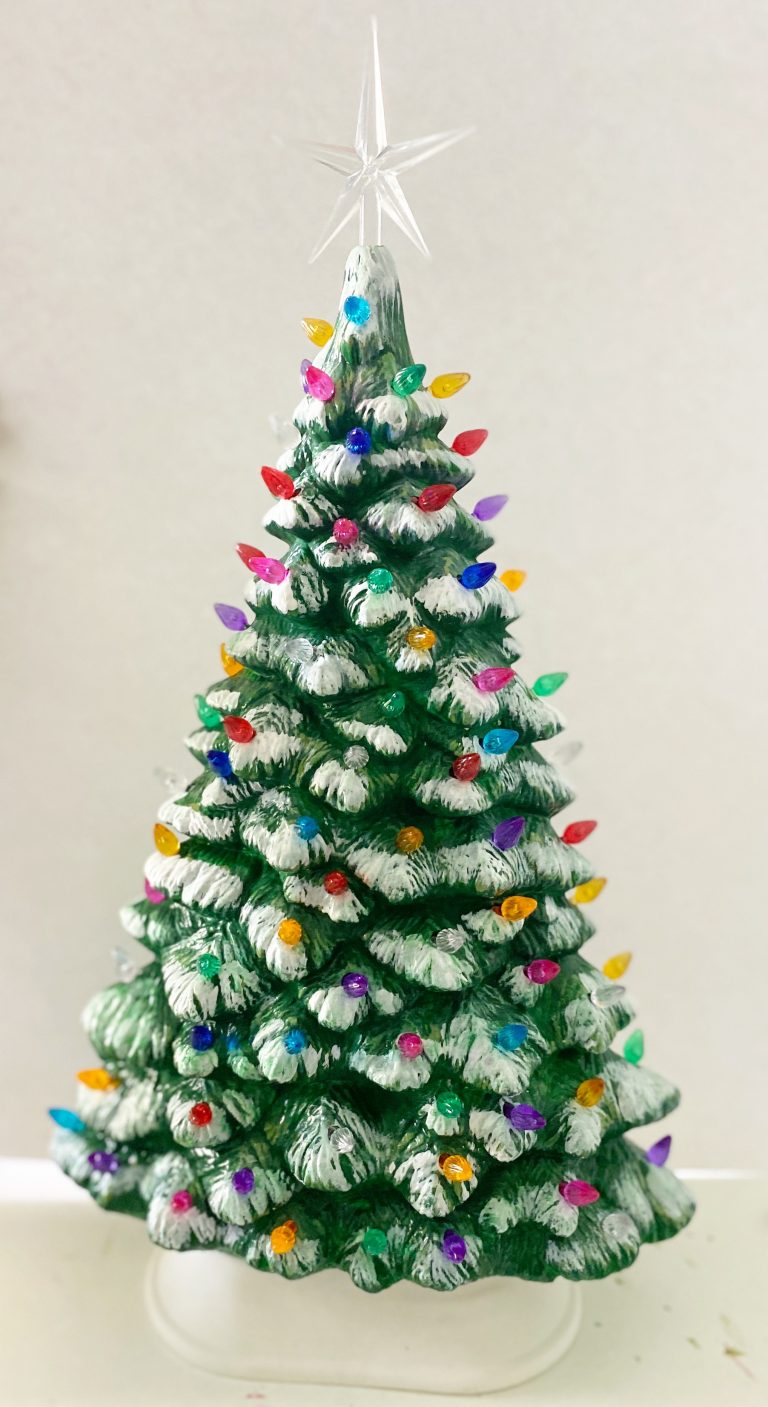
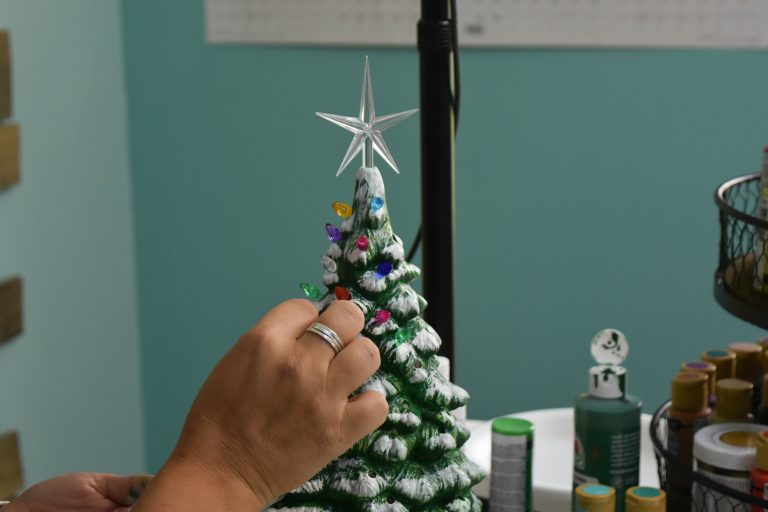
The neat thing that I love about the ceramic Christmas trees in my shop is that they come with the adorable little light bulbs and star on top. These little pieces just pop into the holes on the Christmas tree so easily.
If this ceramic Christmas tree got you into the holiday spirit like it did for me, then check out my other blog posts for DIY Christmas decor. I have various blog posts written on ways to paint a tangled reindeer door hanger, how to make decor out of a mason jar, and even a blog post highlighting some of my favorite Christmas door hanger designs.
Check Out the Video Tutorial
If you already follow me on facebook, I hope you caught my video tutorial of how to paint a ceramic Christmas tree when I originally painted it live. If not, make sure you watch it now and I’ll show you exactly how I painted mine, step-by-step:
Once you’ve finished your ceramic Christmas tree, I would love to see it! Be sure that you share it in my free facebook group for painters! I love hanging out in this group to see what you all are creating. This is also a great place for us to be inspired by each other. If you’re looking for other Christmas decor to paint, check out this Christmas llama door hanger with presents!
I hope you’ve enjoyed this nostalgic painting trip back to grandma’s house as much as I have. I can’t wait to paint with you again soon!
Find It In My Shop:
Previous
Next
Featured Products
Want to Save This Vintage Ceramic Christmas Tree? Pin it for later:

Get the Help and Inspiration You Need!
Make sure you follow me on Facebook, Pinterest, and Instagram to get even more ideas, video tutorials, links to my favorite products, and lots of other fun stuff!
Never even heard of a door hanger before and now you’re painting one? Well, let’s back up and visit my blog on door hanger basics for the beginner and how to get started. I’ll walk you through all the basics and give great tips to getting started with painting your own door hanger.
Have you signed up for access to my FREE template gallery? Sign up and you’ll get access to download some of my favorite door hanger templates – for free! Ready for more? Join my new Template Club and get first access to all of my new releases every month, for one low price!
And don’t forget about our Painters’ Clubhouse! Once you join, you’ll become part of a monthly membership group where we paint and learn together! From new techniques and painting tips, to getting access to exclusive content all month long, it’s the best place to grow your painting hobby together with us! Make sure you get on the waiting list so that you’ll be one of the first to have an opportunity to grab a spot when membership opens again. It only opens twice a year – you won’t want to miss it!
Join Our Painters’ Clubhouse Waiting List Now!


what type of glue do you use to glue in the light?
any clear glue will work, like Elmer’s clear glue.
Have you ever painted with the folk art color shift paint?
No, I don’t think Tamara has ever used it.