
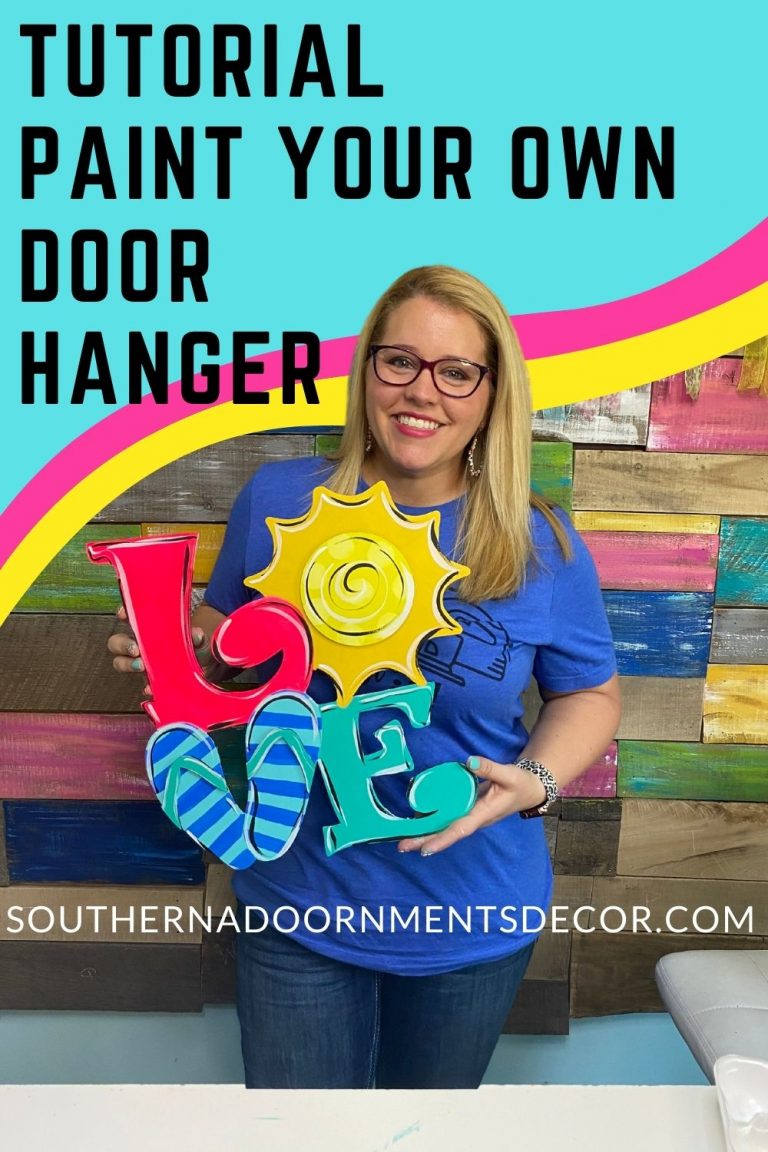
Who else is ready for warmer summer weather? I love summer and will have my flip flops on well into the fall. That’s why I was so excited to paint this Summer LOVE door hanger with you all. I painted it over on Facebook Live and my YouTube channel. If you missed it though, we’ll go over how to paint it now. Let’s get started!
Supply List:
- 1/2 inch flat tip brush
- 1 inch flat tip brush
- 1 inch Sponge Pouncer
- Size 6 round tip brush
- Stick Fast Glue
- Summer LOVE Blank OR Summer LOVE Template
DecoArt Americana Paint Colors:
- Bahama Blue
- Bright Blue
- Teal Mint
- Patio Paint – Sunshine Yellow
- Primary Yellow
- Neon – Sizzling Pink
- Electric Pink
- White
Note: Affiliate links included within this post for your convenience. As an Amazon Associate, I earn from qualifying purchases.
Getting Started
This door hanger is a great option for the beginner painter as it is relatively easy to paint. I added 3D attachments to mine in place of the flip flop straps and the center of the sun. I love the dimension it adds to the Summer LOVE door hanger.
To get started you’ll want to paint the backgrounds of each letter and shape using a one inch flat tip brush. First, paint the sun as bright as possible using the color Primary Yellow. If you wanted to brighten this up even more, you might put a base coat of white paint down before you paint the yellow. Next, using the paint color Teal Mint paint the letter E, Bahama Blue to paint the flip flops, and Electric Pink to paint the letter L.
Once the paint is dry, paint the letter L again with a top coat of the color Sizzling Pink. If you’re a sucker for neon colors like I am this is definitely a great option to make your Summer LOVE door hanger pop!

Adding Some Patterns to the Summer LOVE Door Hanger
Once the background colors are down it’s time to add in some fun patterns and details to the Summer LOVE door hanger! Using a 1/2 inch flat tip brush and bright blue paint, paint horizontal stripes on the flip flops. Don’t get intimidated by these stripes, I just eyeballed them to make them all the same distance apart.
Next, grab the attachment for the center of the sun and paint it using the color Sunshine Yellow. Once it’s dry, add some white paint to the Sunshine Yellow paint and mix it to create a lighter yellow. Then, using a sponge pouncer add some polka dots to the attachment.

Adding Your Attachments
Once I finished the center of the sun, I knew I had to make my flip flop strap attachment pop on this adorable door hanger too! So next you’ll want to use a 1/4 inch flat tip brush and teal mint paint to paint the straps.
Once dry it’s time to add your attachments to your door hanger. I used the Stick Fast Glue that you can find in my Amazon shop. I don’t know if you’ve used this before but I love how easy it is to use and how quickly it dries. Just apply it to the back of your attachment and press it to the door hanger to adhere.
The Final Details
Now to add the finishing touches to this Summer LOVE door hanger! Using a size 6 round tip brush, dip it in white paint to add some swoops around the edges of the sun and the outer edges of your letters. Next, reach for the black paint and do the same thing. It always surprises me how these simple little touches can really make the design of your door hanger stand out.
There you have it, a bright door hanger that’s ready for your summer porch decor!

Watch Me Paint
As I mentioned earlier, I painted this live on my Facebook page. You can watch it below, but head to my Facebook and like my page so that you don’t miss any future live videos either!
I hope that you’ve enjoyed this Summer LOVE door hanger tutorial whether you caught it live or are catching the recap here on the blog. The colors just scream summer to me! I hope to see you on my Facebook page and catch you next time I’m painting live!
Related Resources
- Want to see a blog post round up of Summer door hangers you can paint yourself?
- Check out my Amazon affiliate shop to see some of my favorite painting supplies.
- Shop door hanger blanks and templates on my website.

0 Comments