
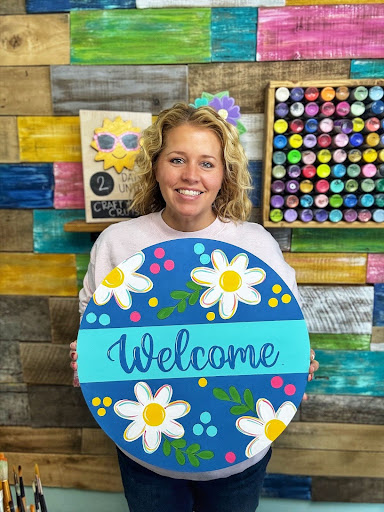
In my last post, I showed you how to cut out a door hanger using a digital template, jigsaw, and sander. We worked through this bonus Magnolia Welcome design, and now, it’s time to show you how to paint it!
In this tutorial, I’ll guide you through:
- Creating a rustic shiplap background (think: cozy farmhouse)
- Painting soft, realistic magnolia flowers with light shading
- Adding bold, clean lettering to bring everything together
You can also purchase the template and wood blank to follow along.
Magnolia Welcome Door Hanger Supply List
Before we start the door hanger tutorial, you’ll need a few supplies first:
- DecoArt Acrylic paints:
- White acrylic paint for the petals
- Dove gray paint for soft shading
- Hauser medium green for painting leaves
- A touch of black paint for added depth
- Burnt sienna and true ochre for the flower centers
- Small flat-tip brush (about 1/4 inch wide) for precision
- Angle-tip brush for detail and shading
- Round-tip brush for painting the flower centers
- Artistro paint pens
- Graphite paper
- Paper towels
- Water cup
- Ballpoint pen or pencil
- Egg carton or paint tray for easy mixing
Once you’ve gathered all your supplies, take a moment to get your workspace ready. Put down a tarp, cardboard, etc. to protect your workspace, then, dig in!
Step #1: Trace Your Design Onto the Blank
After you’ve put out your wood blank, you’ll need to trace your design so you have a guide while you paint. You can do this with a ballpoint pen and some graphite paper.
The graphite paper will make an impression on the wood blank, showing you where to paint — kind of like a coloring book.
Place your graphite paper on top of your wood blank, with your printed door hanger template on top of that. The graphite paper should be placed shiny side down.
Make sure the template is aligned with the wood blank, and start tracing!
Step #2: Paint the Base Coat
For this specific project, I outlined the magnolia flowers with a black Sharpie. I don’t normally do this, but because our base coat will be white and this design is not etched, I wanted to see the flower outline better once the base coat dries.
When painting the base coat of your door hanger, dip your brush into the white paint, being careful not to dollop too much onto the brush. This will make it tough to get those super smooth, even strokes.
Instead, paint in thin, even layers with a damp flat-tip brush, allowing each coat to dry completely before adding the next step.
Step #3: Paint the Leaves
Soften your brush by dipping it in water, then gently press out the excess. Next, dip your brush into the Hauser Medium Green and begin filling in all the leaves.
Start close to the flower and pull outward for smooth, natural-looking strokes. This helps you maintain better control and ensures a crisp edge around the petals.
Want a richer, more even color? Apply two coats!
Once the green paint has dried, mix a tiny bit of black paint with your green to create a darker shade. Lightly brush this around the edges of the leaves where natural shadows would fall.
PRO TIP: It helps to imagine the sunlight hitting from above!
Don’t forget to paint the edges of your door hanger for a polished, finished look once complete!
Step #4: Paint the Magnolia Flowers
Now for the star of the show — the magnolia flowers! Grab your angle-tip brush and let’s take it petal by petal:
- Base Coat: Cover each petal with a layer of white paint. Work quickly so the paint stays wet for the next step.
- Shading: While your paint is still wet, gently dip your brush into the grey paint and add soft shadows where petals overlap or curl.
- Blending: If the shading looks too harsh, use a bit more white paint to soften the edges.
Don’t worry if this feels tricky at first. Practice makes perfect, and even still, the imperfections are what give your door hanger a natural, hand-painted look.!
Step #5: Add Depth to the Leaves
Want an extra challenge? Add some depth to the leaves! Mix a touch of black into your green until you get a deep, shadowy tone. Use your brush to add this darker color to the edges of each leaf, imagining where shadows would naturally fall.
This small detail will make your design feel much more dynamic and will give your leaves that rich, layered look!
Step #6: Paint the Flower Centers
Your magnolia blooms wouldn’t be complete without those iconic centers. When you start painting these details, remember:
- Use your round-tip brush to paint the flower center with burnt sienna for an earthy, realistic tone.
- While the paint is still wet, lightly dab some true ochre on one side of the center for added depth and dimension.
Again, it doesn’t need to be precise! It’s all about texture and natural variation, just like a real magnolia flower!
Step #7: Lettering and Final Touches of the Door Hanger
Once you’re done painting everything, you can start adding the finishing touches, like hand lettering. Here’s how to add that beautiful final detail:
- Place your graphite paper shiny side down on the door hanger.
- Align your template on top and trace around each letter with a ballpoint pen.
- Use a Filbert tip brush (size 8) with black paint to carefully fill in each letter. For an even more precise outline, use a fine round-tip brush, then fill in the centers.
- Once the paint is dry, you can use a black paint pen if you want to define the letters a bit more. For extra dimension, use a white paint pen to add subtle highlights to the petals and leaves.
These small details are what make a door hanger design stick out, so don’t be afraid to get creative with them!
Once you’re done, allow the door hanger to dry completely before doing anything else (bows, sealing, etc.).
Step #8: Celebrate Your Masterpiece!
You did it! Look at you go!
If you’re excited about your finished piece, share your progress photos with me over on Facebook. You never know who you’ll inspire by sharing your creative journey!
What’s Next?
If you loved this project and want to keep painting beautiful designs like this, I have a free paint party for you on March 29th!
We’ll be painting another beautiful design together, and you’ll get to see a full tutorial, start to finish, in real time! You’ll also get a free template and supply list to support you as you paint along with us.
Sound like fun? Learn more and sign up (for FREE!) here.

0 Comments