Do you follow me on Facebook? I recently painted this shabby chic sign for a friend’s boutique shop live on there. And I wanted to come back here to post about more of the details! This is a fun, trendy style to DIY, and it’s such a flexible design. You could easily use this shabby stripes rustic door hanger for a new baby, a bridal shower or wedding decor piece, or a personalized monogram welcome sign on the front door. It’s a great custom gift idea for so many occasions!
Supply List
- Flat Tip Brush
- DecorArt Acrylic Paints
- DecoArt Metallics Bright Metallic Vintage Brass Paint
- 4in Paint Brush
- Round Tip Brush – Size 8
- “Square Frame” Door Hanger Blank
- -OR- “Square Frame” Printable Template and Digital Cut File
Plus: Supplies Listed from this Hand Lettering Technique
Note: Affiliate links included within this post for your convenience. As an Amazon Associate, I earn from qualifying purchases.
Painting Shabby Stripes on Your Door Hanger:
Painting stripes does not have to be a painstaking task! Especially when you make them shabby stripes! To create this look, I started by painting the entire surface white. Then I traced out a 12 inch circle (using a cardboard template) in the middle. Next, I used a pencil and a yardstick to create the template for stripes. I then proceeded to paint every other stripe black with a flat tip brush. And I didn’t worry too much about saying inside the lines or making our lines look perfect since we were going to make it look shabby.
The next step is to distress the stripes to give them a shabby, vintage style. I’ve been using a large 4-inch paintbrush that I got from the dollar tree years ago. This brush was in pretty bad shape but it’s perfect for this. I used it to dry-brush some white on top of the black stripes and some light gray on top of the white stripes, giving it the shabby look.
Next, I traced the circle in the middle using DecoArt Metallics Bright Metallic paint in “Vintage Brass”.
Adding the Flower Details:
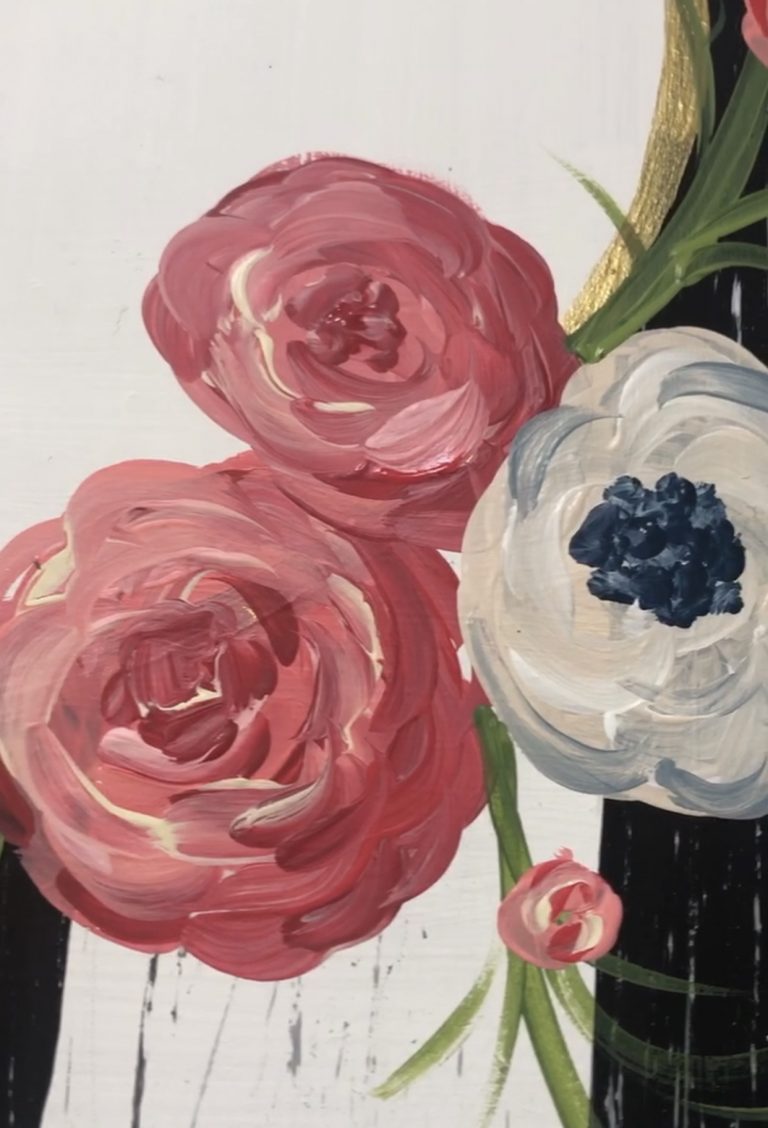
For the next step, I started with a round tip brush and 4 different colors of pink and red. I swooped and swirled the paint to create these simple flowers. They remind me of a garden full of cabbage roses! I also used a DecoArt color called Sugared Peach and just a touch of Grey Mist to create a cream colored flower with a navy center.
Then I used Hauser medium green to create vines and leaves with tendrils coming out from behind the flowers. Next I repeated this same floral pattern in the upper corner opposite the bottom.
Hand Lettering the Sign
https://southernadoornmentsdecor.com/wp-content/uploads/2019/11/Door-Hanger-Hand-Lettering-Trick-Video-Tutorial-by-Southern-ADOORnments.mp4
I used one of my favorite hand lettering tricks to make sure that the text on the sign looked perfect. Take a look at this video to give you a quick idea of how I did it. And you can get all the full details of this hand lettering technique on one of my recent blog posts! It helps ensure that I’ve planned everything out to fit neatly within the space.
I created this sign for a friend of mine to use in her business. So we put her business name in the middle. But this door hanger would be a great one to use as a wedding gift, or for a baby announcement door hanger. It would even look beautiful with someone’s monogram in the middle!
Look at how nicely all of the details came together. One of my favorite things about this DIY style is that you don’t have to be a perfectionist. When you add the shabby details, it all fits together in the end. Its vintage, rustic charm brings a sweet nostalgic vibe to your front porch or wall decor!

Watch Each Step of This Shabby Stripes and Flowers Door Hanger:
If you already follow me on facebook, you might have already watched this painted shabby stripes video tutorial when I did it live.
But if you missed it, take a look! You can see all of the details of how I paint each step, from stripes to flowers. Grab your supplies and you can DIY your own along with me!
I hope that this has inspired you to add some fun, shabby details to your next painted door hanger! Make sure you share your projects with us once you’ve tried it! You can find the painting supplies that you need in my online shop or Amazon door hanger supply storefront, and you can also get this “Square Frame” door hanger as a ready-to-paint blank or printable template right from my online shop :
Find It In My Shop:
Previous
Next
Featured Products
Get the Help and Inspiration You Need!
Make sure you follow me on Facebook, Pinterest, and Instagram to get even more ideas, video tutorials, links to my favorite products, and lots of other fun stuff!
Have you signed up for access to my FREE template gallery? Sign up and you’ll get access to download some of my favorite door hanger templates – for free!
And don’t forget about our Painters’ Clubhouse! Once you join, you’ll become part of a monthly membership group where we paint and learn together! From new techniques and painting tips, to getting access to exclusive content all month long, it’s the best place to grow your painting hobby together with us! Make sure you get on the waiting list so that you’ll be one of the first to have an opportunity to grab a spot when membership opens again.other


0 Comments