
Some of the links shared in this blog post are affiliate links. This means I make a small commission when you purchase through these links at no extra cost to you. All opinions and reviews shown are honest and my own. Thank you for supporting my small business!
The sun is shining, the birds are chirping, and spring has sprung! You know what that means? It’s time to brighten up your days with some fresh, colorful florals!
And I don’t know about you, but there’s just something about the arrival of warm weather that makes me want to pick up a paintbrush and add a little whimsy to everything!
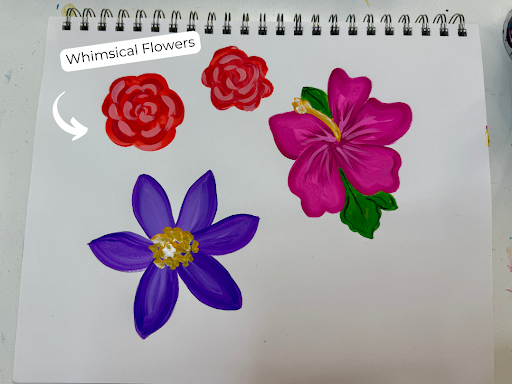
Because of this fresh spring inspiration, I’m going to walk you through three different ways to paint flowers: whimsical blooms, bold hibiscus, and pointed petal flowers. Each of these has its own unique charm, so there’s bound to be a style that speaks to you.
Grab your brushes and let’s bring some spring magic to life!
Whimsical Blooms: Playful and Approachable
If you’re just getting started with painting flowers, whimsical blooms are a perfect introduction. They’re loose, playful, and if you make a mistake, easy to cover up. That’s the beauty of whimsical styles! There’s less focus on being perfect and more on having fun!
What You’ll Need:
For the project shown in the video, I used:
- Filbert Tip Brush: This rounded brush helps create soft, organic petal shapes.
- Paint Colors:
- Tea Berry (base): A warm, reddish coral
- Watermelon Slice (depth): A deeper, vibrant red-pink
- Cotton Candy (highlights): A soft, pastel pink
I definitely recommend sticking with this brush, but you can use any colors you want on this design!
Step-by-Step Instructions:
- Create the Flower Shape: Using your filbert brush, paint a loose, round shape with Tea Berry. Don’t get caught up in making perfect petal outlines — just go for an organic, bumpy edge.
- Add Depth: Once your base layer is dry, switch to a round tip brush and apply small strokes of Watermelon Slice around the edges. You can start in the center and work outward, using little “C” shapes that interlock for a natural look.
- Highlight the Petals: Mix Cotton Candy with a bit of Tea Berry to create a lighter pink, then layer it beside your darker strokes. This adds dimension and will make the petals pop!
Pro Tip: If your colors start looking muddy, let everything dry before adding another layer. Wet-on-wet painting can sometimes create a messy blend.
Bold Hibiscus: Tropical and Vibrant
Love bright, bold colors? Hibiscus flowers are for you! They’re one of my favorites to paint because they’re eye-catching and free-flowing, with a natural shape that’s easy to paint.

What You’ll Need:
To create the hibiscus flowers you see in the video, I used:
- Flat Tip Brush or Angle Tip Brush: Both work well, but if you’re a beginner, an angle brush will be easier to control.
- Paint Colors:
- Carousel Pink (base): A bright, happy pink
- Joyful Pink (depth): A deeper pink for contrast
- Sunset Gold (center/pistil): A warm golden yellow
- New Leaf (leaves): A fresh green for foliage
Again, I recommend using these brushes, but you can paint with any colors you want.
Step-by-Step Instructions:
- Load Your Brush with Two Colors: On one side of your brush, load Joyful Pink (the darker shade), and on the other, Carousel Pink (the lighter shade). This will create a natural gradient.
- Form the Petals: Start at the base of each petal and stroke outward toward the tip, making sure the darker color stays on the outer edge. If you lose the blend, reload your brush and go over it again.
- Add Petal Details: With the darker color, use the tip of your brush to add small strokes at the base of each petal, creating a “bursting” effect.
- Paint the Pistil (Flower Center): Using a round tip brush, paint a curved line coming out from the flower’s center with Sunset Gold. You can add tiny white dots at the tip for extra detail.
- Add Leaves: Carefully paint small leaves around the petals, positioning them behind the flower for a layered effect.
Pro Tip: If you’re blending two colors at once, practice on a scrap piece of paper before painting directly onto your project. You can adjust before you add the paint onto your design, making pivoting much easier!
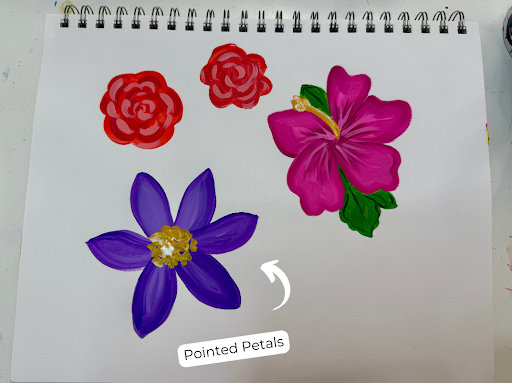
Pointed Petal Flower: Elegant and Delicate
This floral style is slightly more structured and gives a more polished, detailed look. I love it for those learning how to paint because it requires a lot of brush control. If you’re trying to improve those shaky lines, this is a great way to practice!
What You’ll Need:
For the design I showed you in the video, I used:
- Angle Tip Brush: Helps with smooth, controlled strokes.
- Paint Colors:
- Purple Cow (base): A deep, rich purple
- Lavender (highlights): A soft lilac shade
Be mindful of changing the brush type. While you can still get angular edges with other paintbrushes, the angle brush is going to give you the most control!
Step-by-Step Instructions:
- Load Your Brush with Two Colors: Just like with the hibiscus, put the darker Purple Cow on the toe of your angle brush and the lighter Lavender on the heel.
- Paint from Tip to Base: Unlike the hibiscus, start at the tip of the petal and pull your brush downward toward the flower’s center. This technique gives the flower a different, more structured look.
- Build the Petals: Continue painting six petals around the center, keeping the darker shade on the outside edge.
- Add the Center Details: Using a round tip brush, dab Sunset Gold mixed with white in the center of the flower for a bright focal point.
Pro Tip: If pulling your brush from tip to base feels awkward, try starting at the base and painting outward instead. Whatever you do, it should feel natural!
Finishing Touches: Bringing Your Flowers to Life
Whatever design you choose to practice your painting skills with, don’t forget to add the finishing touches! Greenery, vines, and tiny sprigs of leaves help make your flowers feel lifelike, while adding highlights can help them pop.
And remember — if you’re struggling with freehanding your flowers, our door hanger templates and wood blanks make it easy. The designs are already drawn or etched onto the surface, so all you have to do is paint — and have fun, of course!
You can see all our floral door hanger designs here!
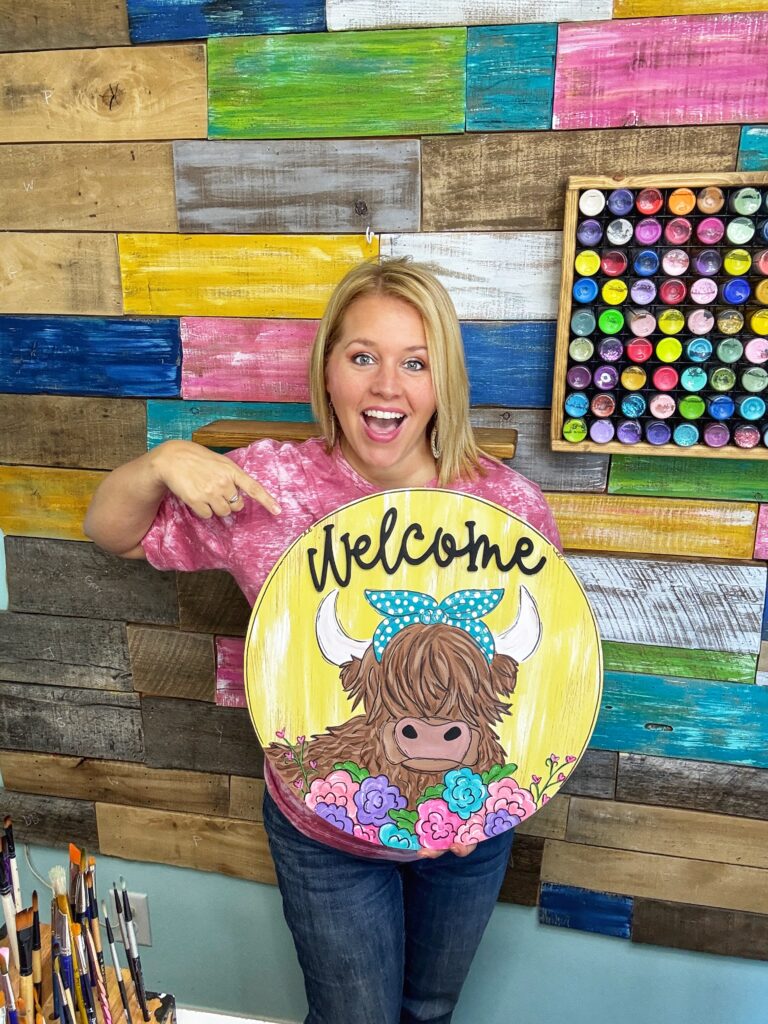
Join Our Spring Workshop!
If you enjoy painting florals, then our upcoming workshop is right up your alley! We’re painting a new Lola the Highland Cow design — Bandana Lola — which includes some beautiful hand painted flowers.
It’s just $10 to join — sign up now to get access to the door hanger template, supply list, and two nights of live instruction as I teach you how to paint!
We go live April 15th-17th. Reserve your spot here!

0 Comments