
Don’t get me wrong, I LOVE door hangers! Creating them has been my favorite thing to do for almost an entire decade. And not to mention, my entire business is based on door hangers. So you know I’m being honest!
And if you’re reading this, I’m assuming you love them too. But having a brand new door hanger for every season and celebration isn’t always an option. Maybe you’re low on storage space, or need something a little more portable.
That’s where interchangeable attachment signs come in! In this video, I’ll be covering all there is to know about attachments, so if you’re curious about adding them to your craft stash, keep reading!
What’s the Hype Around Interchangeable Attachment Signs?
Interchangeable attachment signs — kind of like mini door hangers — are small pieces you can stick off and on your door hanger base. And they have so many benefits!
For one, if you’re low on space, these are the way to go. Just hang them on a base piece on the door and swap out the attachments. There’s much less storage space involved.
They also make great gift ideas, as you can continue to gift new seasons and styles year-round!
And if you’re selling door hangers at a paint party or craft fair, they’re great at driving repeat business. Customers often come back for more attachments or book paint parties to create new pieces.
How Do You Attach the Pieces?
So now the big question…how do you use them?
The best way to attach your interchangeable attachments is to use super glue to attach a high-powered magnet to the base door hanger, and a metal disc with adhesive to the back of each attachment.
This usually holds up better than Velcro!
Need a visual? Make sure you watch the video above at the quarter mark!
Designing Your Base Door Hanger
If these sound like something you’re interested in painting, the good news is that it’s super easy! You’ll just follow the same instructions you would when painting a regular-sized door hanger.
Here are some other tips to help you get started:
- Keep the Base Design Simple: Let the attachment piece be the star. For example, a simple house shape with “HME” and an interchangeable “O.”
- Choose a Year-Round Design: The base piece should be usable all year, with neutral colors that complement different attachments.
- Accommodate Various Shapes: Ensure the attachment area can fit various shapes, from circles to triangles.
- Create a Consistent Color Palette: Don’t go overboard with your colors — 12-14 should do it! That way, you know that no matter what attachment you’re changing out, you’ll keep a cohesive look.
Interchangeable Attachment Sign Design Ideas
Need some inspiration to help you get started? Here are some of my favorite ideas!
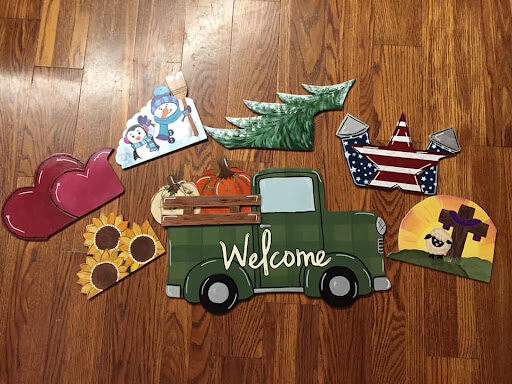
A welcome truck is always a classic — in fact, it’s one of our best sellers!
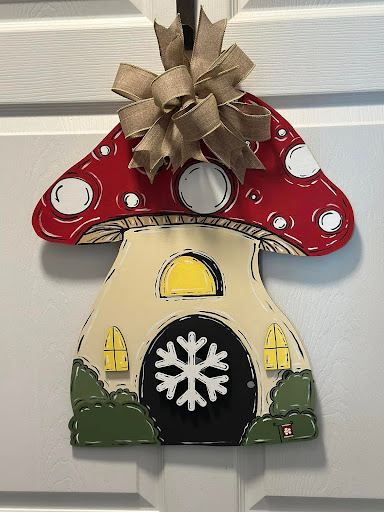
I also love this mushroom house, where attachments are placed in the doorway. This was painted by Painter’s Clubhouse member, Tammy!

And you can’t go wrong with a gnome right? This one was taught by Erica Wallace inside the Painter’s Clubhouse a few years ago!

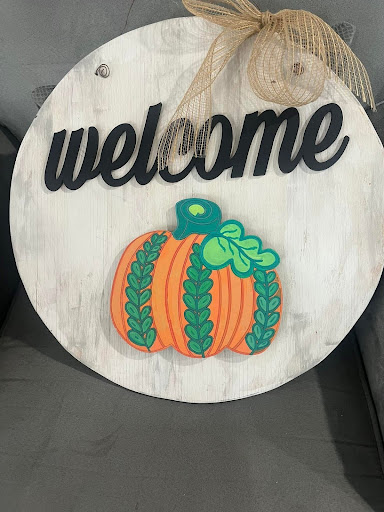
Prefer a more classic look? This welcome sign is for you!
Ready to Get Started?
If you haven’t tried painting a door hanger with attachments yet…well, what are you waiting for? Use this tutorial to guide you, then head over to the shop to find the right designs for you!
Don’t Forget About the Painter’s Clubhouse Crafting Cruise!
The Painter’s Clubhouse Crafting Cruise tickets are on sale NOW! But hurry, doors close on February 20th. If you want to set sail with us to Mexico, grab yours ASAP!

0 Comments