
You guys already know I’m all about giving you the tools you need to be successful. Today we’re going to talk about how to use a printable door hanger template. If you’ve been painting door hangers for a while you might be looking for ways to cut costs so you can get more money in your pocket. Cutting your own blanks is a great way to save money.
In my shop, you can find a variety of templates and digital cut files to make cutting your own blanks a piece of cake. These templates are designed so you can print them at home and use them to cut your own door hanger blanks at home using a jigsaw. Don’t get overwhelmed or feel discouraged if you aren’t tech savvy. I’m about to walk you step-by-step through how to use a printable door hanger template.
What You’ll Learn:
1. How to Download Your Template File
2. How to Unzip Your Template File
3. What are the Different File Types For?
4. How to Print the Correct Size Template
5. How to Resize Your Template
6. How to Assemble Your Template
7. How to Transfer the Lines from the Template to the Wood
8. How to Store Printed Templates
Note: Affiliate links included within this post for your convenience. As an Amazon Associate, I earn from qualifying purchases.
So you’ve looked through my thousands of templates on www.shopdoorhangers.com and found your favorites. What’s next? You need to download the template onto your computer. To do this you will need to login to your account on the website. Once you login to your account, you will choose the order number you would like to download. Next, you will click the pink “download here” link.

Clicking the pink link will open up a new page on your computer. Choose “download” and the download will start to automatically download. That was simple enough, right? Now let’s talk about how to get those files!
How to Unzip Your Template File
Southern A-Door-nments Decor’s printable templates come in a zipped folder. The zipped folder contains the following files:
- JPEG
- DXF
- EPS
- SVG
In order to access your template files, you will need to unzip the zipped folder. You can right-click on the folder and choose to unzip your file. Some computers will automatically unzip the file for you. Other computers might have you download software to unzip your folders. *Unfortunately, we are unable to offer technical support for every computer brand. Please refer to the maker of your software on how to unzip a file on your computer.*
If you are downloading your template onto a mobile device, please check out this video
What are the Different File Types For?
I know what you’re thinking, five files in one template folder seems like a lot. What are they all for? Well let me break it down for you:
The file types that are included in the file are:
- PDF – This is used for printing from your computer or you can have this file printed at a UPS Store, Office Max, Staples, etc.
- JPEG – The black and white JPEG file is included so you can create a larger or smaller size template for your door hanger. You can also print this out onto a transparency film sheet to use with an overhead projector.
- DXF – This file is for a graphic image format typically used with AutoCAD (Computer Assisted Drafting) software.
- EPS – This is a vector format designed for printing to PostScript printers and imagesetters.
- SVG – Scalable Vector Graphics.
How to Print the Correct Size Template
Now you have the folder downloaded and unzipped, but how do you print the correct size template to ensure your door hanger is the right size? To print you’re going to want to open the PDF file. Next, you’re going to print, but before you do check your print settings.
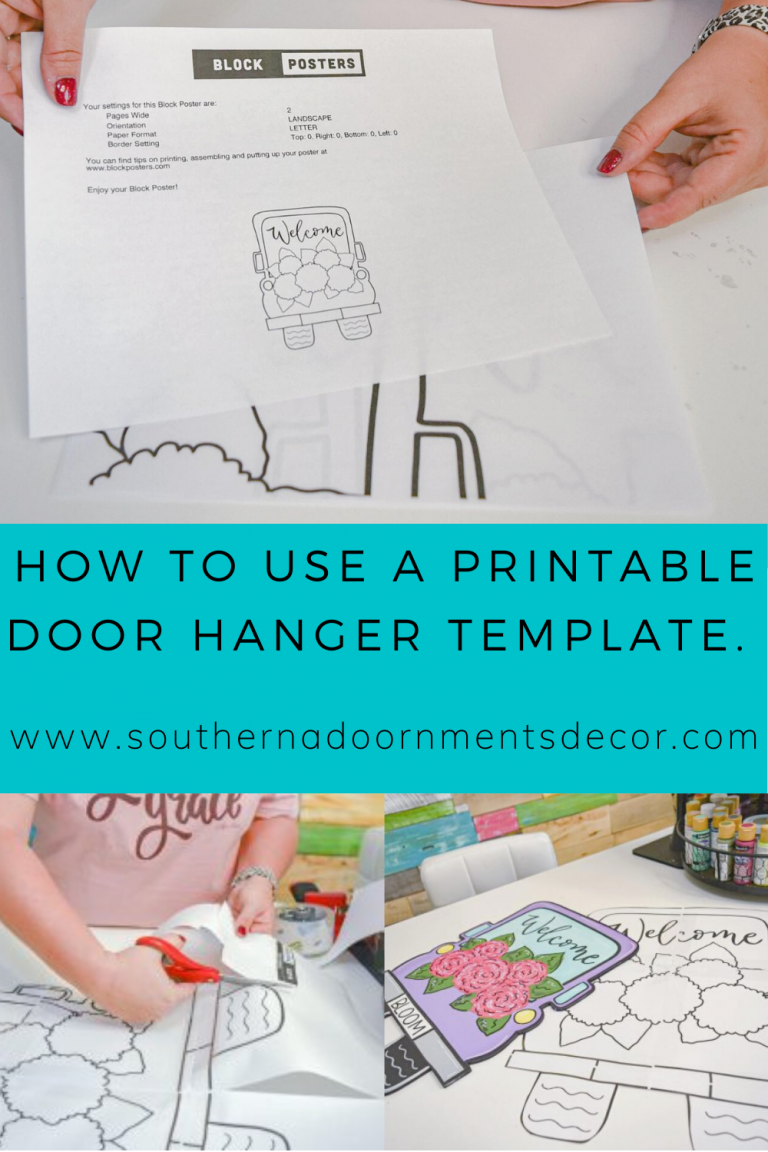
Be sure that your printer is set to print Actual Size. If it’s set to “custom” or “fit to page”, the template will be too small for a door hanger. Next, you’re going to check Orientation, you will look on the first page to see how the template should be printed out. When you’re ready go ahead and print that template out, you totally got this!

How to Resize Your Template
Oh no, do you need a different sized template? Don’t fret, resizing the template is easy! Be sure to use the black and white JPEG file from your folder. Go to https://www.blockposters.com/ and load the JPEG file to create a different size template. Tada, told you that was cake! You can now use your resized template file to print your template.

How to Assemble Your Template


Phew! Now that the tech steps to printing your door hanger template are behind us, let’s put your new template together.
To start, you’re going to line up your template and tape it. You will assemble the template by adding one page at a time. Once it’s assembled, cut your template out.
Now that you have your template cut out, what’s next? You will trace your outline onto your wood to cut it out.
After tracing the outline, you can use a jigsaw or a scroll saw to cut out your blank door hanger.
How to Transfer the Lines from the Template to the Wood
Here’s the fun part, how to use a printable door hanger template! Transferring lines from the printable door hanger template to your wood isn’t as hard as you would think.
I always use graphite paper because I’ve found it’s the easiest way to do it. There is some graphite paper linked in my Amazon store, but you can pick some up at Hobby Lobby or other craft stores. Personally, I recommend buying the big sheet of graphite paper. You’re going to be using a lot of it going forward as you print more templates.
To transfer the lines to your blank, lay the shiny side of the graphite paper down on your wood.
Next, place your template on top of the graphite paper, lining it up with the outline of the wood. Use a pen to trace over all the template lines. Once you are done, your lines will be on your blank and it will be easy to paint! It’s similar to paint by number, and you’ll be able to paint and complete your door hanger!
How to Store Printed Templates
Now that you’ve worked so hard for a printed template, you’re definitely not going to throw it away when you’re done. I like to fold my templates up and store them in a folder or envelope. Taping the first page of the template on the front of the envelope will help you quickly identify which template is in the envelope. Keep them tucked away so you can easily access them when you need it again!
Where to Find Printable Door Hanger Templates
Now that you know how to use a printable door hanger template, the opportunities are endless. I have so many templates available in my shop! You can shop them all and add all your favorites to cart.
I’m so glad I was able to break down using printable door hanger templates for you today! Be sure to like my Facebook Page and get notifications of when I go live. Every Friday during my Friday Fab Five videos I talk about the new templates that were released for that week, so your options will always be increasing. You can also share on Mondays what you’ve made recently on my “Made it Monday” Facebook post. I hope to catch you there soon, I can’t wait to see all the pieces you’ve made with your printable door hanger templates!
Get the Help and Inspiration You Need!
Make sure you follow me on Facebook, Pinterest, and Instagram to get even more ideas, video tutorials, links to my favorite products, and lots of other fun stuff!
Never even heard of a door hanger before and now you’re painting one? Well, let’s back up and visit my blog on door hanger basics for the beginner and how to get started. I’ll walk you through all the basics and give great tips to getting started with painting your own door hanger.
Have you signed up for access to my FREE template gallery? Sign up and you’ll get access to download some of my favorite door hanger templates – for free! Ready for more? Join my new Template Club and get first access to all of my new releases every month, for one low price!
And don’t forget about our Painters’ Clubhouse! Once you join, you’ll become part of a monthly membership group where we paint and learn together! From new techniques and painting tips, to getting access to exclusive content all month long, it’s the best place to grow your painting hobby together with us! Make sure you get on the waiting list so that you’ll be one of the first to have an opportunity to grab a spot when membership opens again. It only opens twice a year – you won’t want to miss it!

0 Comments