Paint Brushes for Hand Lettering: Round Tip vs Filbert Tip
One of the big questions that I get asked all the time is about choosing the best brushes! I even have another post about choosing brushes for door hangers here. Choosing the right paint brush is a big part of getting your door hangers to turn out exactly how you want them to look. Especially for detail work like hand lettering!
Hand lettering can be such an intimidating part of door hanger painting. I recently talked about that in my last post, where I shared a favorite technique for easy hand lettering. And part of that is because there are so many different kinds of brushes out there for door hangers. So in this post I wanted to focus on two of my favorite kinds of brushes for hand lettering: round tip and filbert tip.
Note: Affiliate links included within this post for your convenience. As an Amazon Associate, I earn from qualifying purchases.
Supply List
- Mixed Media Art Paper Pad
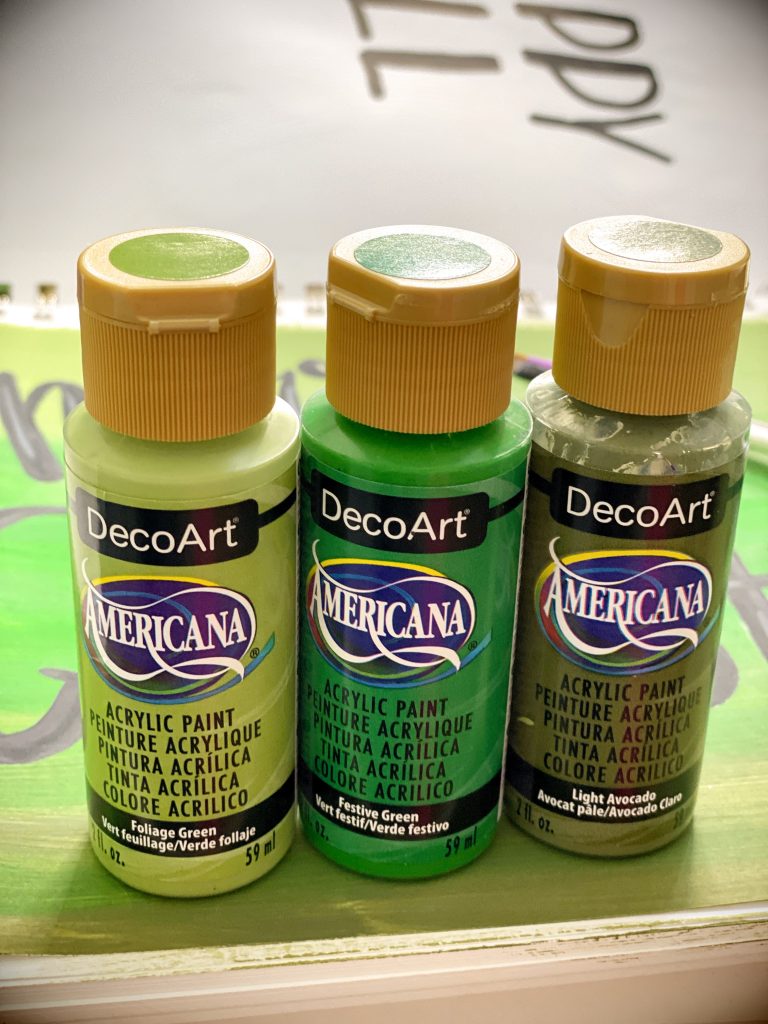
- DecoArt Americana Paint (in your choice of colors)
- Filbert Tip Paint Brush Set
- Round Point Paint Brush Set
- -OR- Assorted Tips Paint Brush Variety Set

If you aren’t sure about the difference, take a look at this photo. The purple brush with a pointed tip on the left is a “round tip” brush. The brush on the right is a “filbert tip” brush. It’s kind of flat. But it’s different than a regular flat-tip brush because, as you can see, it is slightly rounded on the edges.
In my shop you can find both my favorite round paint brushes, and my favorite filbert tip paint brush set in a range of sizes. I also have a small assorted pack of paint brushes with both round tip and filbert brushes if you’d like to try starting with just a few of each type of brush for hand lettering.
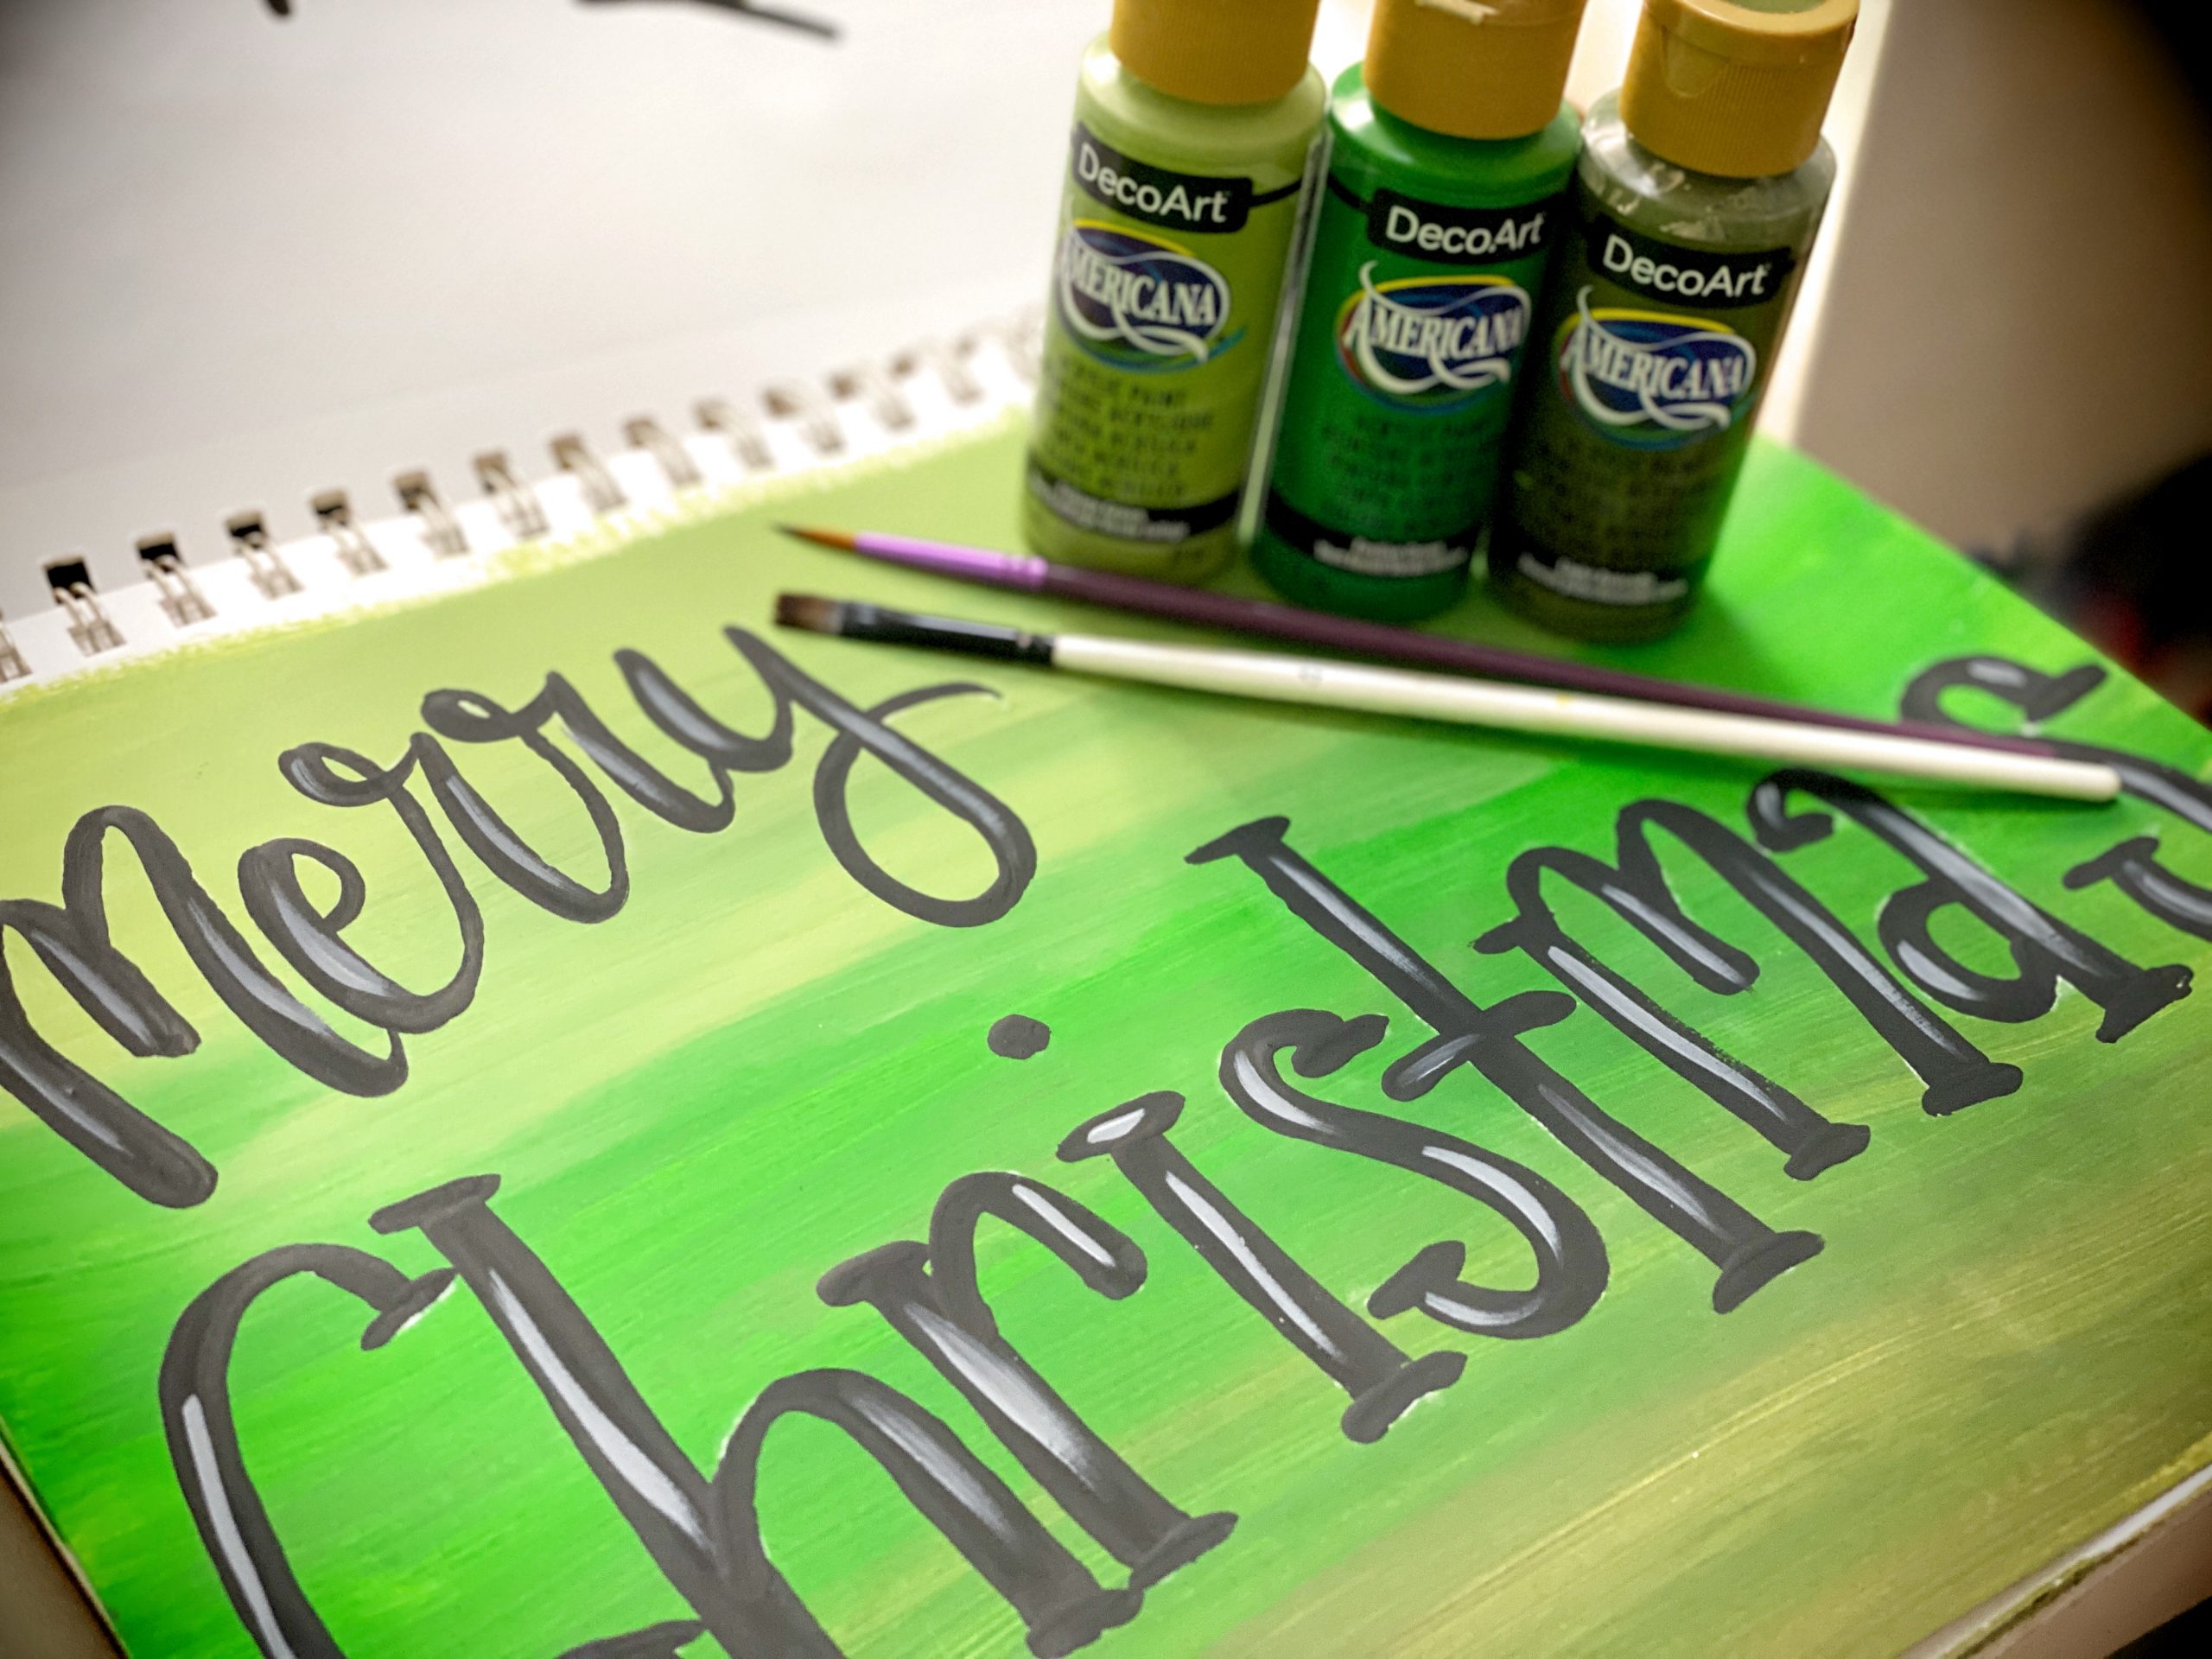
Creating a “Merry Christmas” Hand Lettering Sample with Both Paint Brushes
Generally, I like to use the round tip brushes for script lettering like cursive, and the filbert for “cute” lettering like print or something whimsical. So I wanted to show you an example of each, writing in both script and print. Since this was just a sample, I painted on a mixed media paper pad, which are great to have on hand for practicing your painting skills.
Let the Painting Begin!
I started by painting an ombre background with three different shades of green by DecoArt Americana. (Have I mentioned that I love the color green??). Then I was ready to hand letter the words “Merry Christmas”.
I recommend writing out your lettering first using a piece of chalk. This allows you to easily wipe it away if you do not like the way it looks. It’s also easily wiped away when you’re done painting if there’s any chalk still showing.
If you’re not quite ready for the chalk lines, try this easy hand lettering technique that I described in my last post and video tutorial!
Using Both Brushes for Hand Lettering
The round tip and Filbert tip brushes that I have in my shop each come with 12 different sizes. I hardly ever use the largest size of either set of brushes unless I’m working on a really large project. Door hangers are usually too small to use these size brushes for lettering. But they would be good for something like painting a large outdoor sign.
I always recommend starting with a smaller brush size and working your way up if you feel like the letters aren’t thick enough. And of course with script lettering, thicken up your down strokes to make them look more like brush lettering.
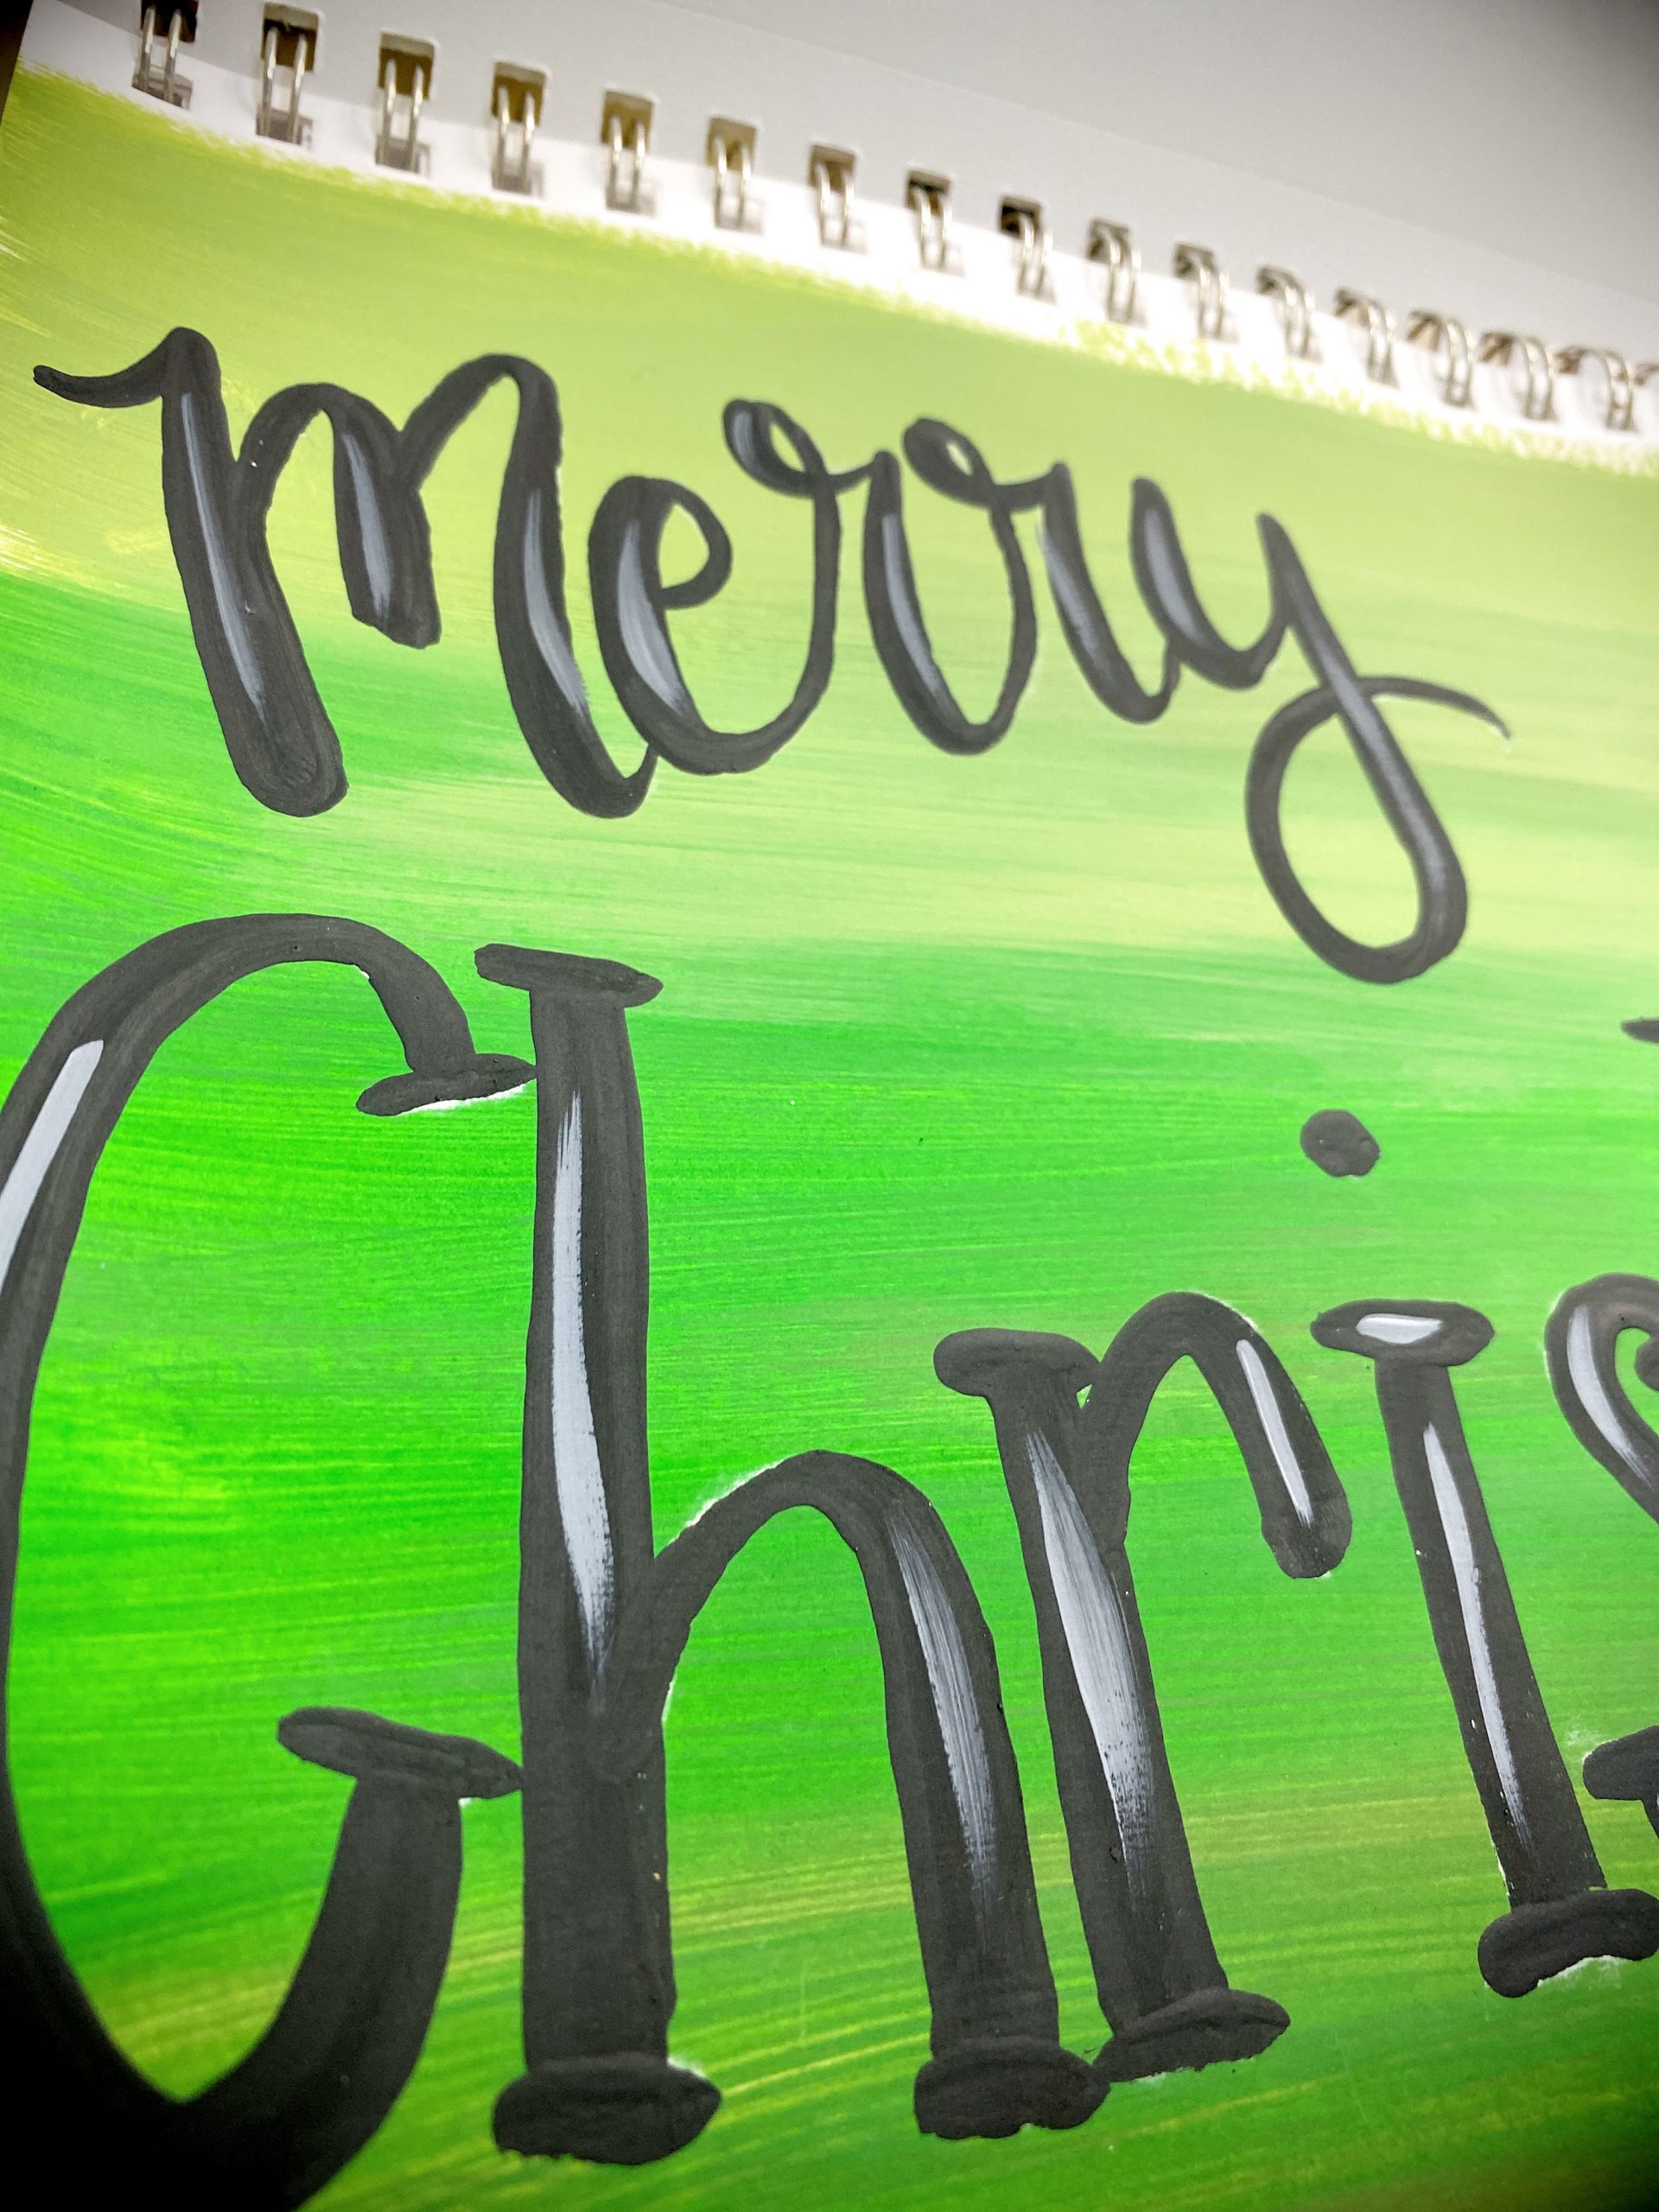

At the top of my paper, I wrote “Merry” in script. Then I changed it up and wrote “Christmas” in print.
Then I looked through my brush set to find the size that would fit perfectly with the width of the chalk letters. Tip: Don’t forget that as you press down on the painting, the brush tip will spread out and be wider than it looks in your hand. You should probably pick a smaller brush than you first think you should choose!
Now We Can Fill In the Letters:

Next I began painting over the chalk lines with my brushes (round tip for script, filbert for the print). I started with a size 1 round tip brush.
Another tip: water down your paint just a little when you’re hand lettering. It will make it easier to spread and fill in the details, and your paint will go farther. And make sure you keep plenty of paint on your brush!
If you look closely, you can see that I pushed down with more pressure on my downstroke, and went lighter on the upstroke. That gives more weight and balance to the letters.
I finished with a little white paint mixed with black to add some highlight accents. I used a size 1 round tip brush for these highlights.
And that’s all there is to it! I promise that if you just go through the steps and do a little practice, you will be pleasantly surprised with your results!
Check Out the Full Video Tutorial on Brushes for Hand Lettering:
I hope that these quick tips will help build your hand lettering skills and boost your confidence! Like I said, choosing the right brushes for hand lettering makes all the difference.
If you want more details, or just want to see each step in action, check out this hand lettering brush video tutorial I recently did live on my facebook page. You can watch me paint each step and show you more details of the different brushes I used:
Connect With Me for More Tips and Resources!
Make sure you follow me on Facebook, Pinterest, and Instagram to get even more ideas, video tutorials, links to my favorite products, and lots of other fun stuff!
Have you signed up for access to my FREE template gallery? Sign up and you’ll get access to download some of my favorite door hanger templates – for free! (Not sure what a template is or why you might want one? Take a look at this post where I explain templates and door hanger blanks!)
And don’t forget about our Painters’ Clubhouse! Once you join, you’ll become part of a monthly membership group where we paint and learn together! From new techniques and painting tips, to getting access to exclusive content all month long, it’s the best place to grow your painting hobby together with us! Make sure you get on the waiting list so that you’ll be one of the first to have an opportunity to grab a spot when membership opens again.other
Join Our Painters’ Clubhouse Waiting List Now!


0 Comments