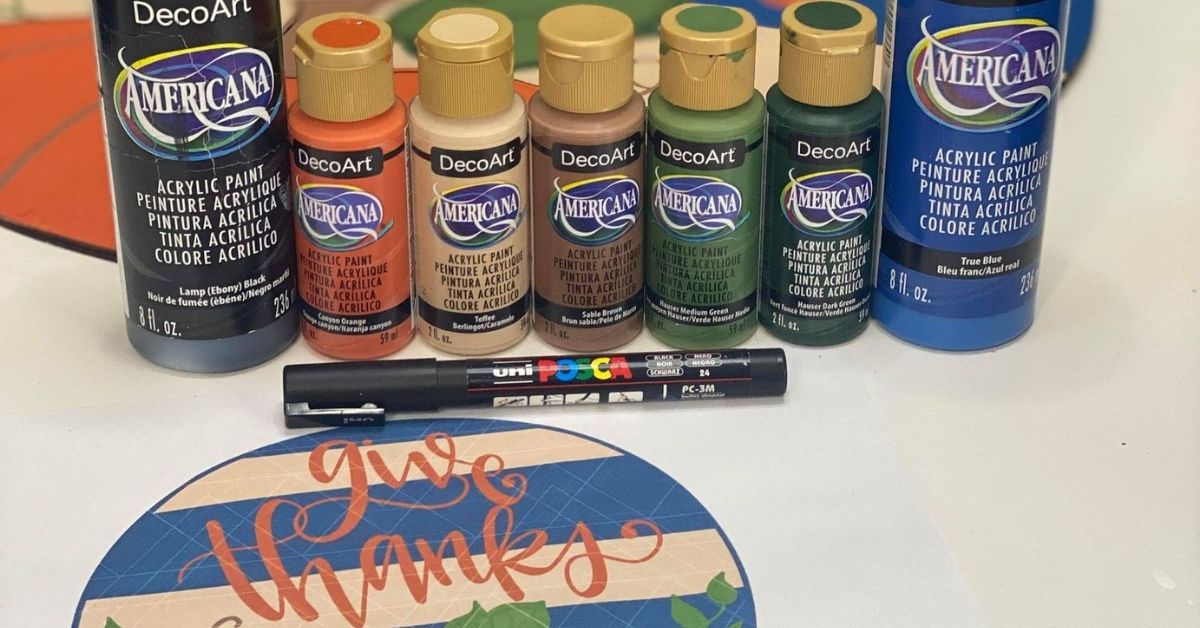
Supply List
- Give Thanks Door Hanger Blank
- Give Thanks Door Hanger Template
- One inch flat tip brush
- 1/2 inch flat tip brush
- Small round tip brush
- Filbert tip brush
- Black 3M Posca Paint Pen
DecoArt Americana Paint Colors:
Note: Affiliate links included within this post for your convenience. As an Amazon Associate, I earn from qualifying purchases.

Getting Started on the Give Thanks Door Hanger
If you order your Give Thanks door hanger blank from my shop at shopdoorhangers.com, you can pick out an etched wooden blank which will make this tutorial very simple. If you choose to purchase a template and cut your own blank at home, you will need to trace the template so that you have the design and lines on your door hanger. Not exactly sure how to use a printable template? Here’s a blog post I wrote with a step-by-step tutorial of how to use a printable template.
You can pick up all the paint colors needed for this tutorial on DecoArt’s website using my affiliate link. I also have a link where you can purchase some paintbrushes too. Now that we’re ready to get started on our Give Thanks Door Hanger, let’s dive right in!

Let’s Paint the Shiplap on Our Give Thanks Door Hanger
Start by painting every other shiplap stripe with the color Toffee and a one inch flat tip brush. Next, mix a bit of True Blue paint with a drop of Black paint. Using a one inch flat tip brush, paint the stripes between the Toffee colored stripes. Tada, your shiplap stripes are complete!
Make it Festive by Adding a Pumpkin
Next, switch to the color Canyon Orange and paint the pumpkin at the bottom of the door hanger. Using a 1/2 inch flat tip brush and the color Sable Brown, paint the pumpkin stem. Rinse your brush and switch to the color Hauser Medium Green to paint the leaves on the door hanger. Once the first coat of paint on your pumpkin has dried, add a second coat of Canyon Orange.

Time for Our Final Details
Now that the main parts of our Give Thanks door hanger are painted, it’s time to add the final details to the door hanger. Using a small round tip brush, paint the vines coming from the pumpkin using the color Sable Brown. Rinse the brush and use the color Hauser Medium Green to paint the vines on the door hanger. Finishing up the leaves, use the Hauser Dark Green mixed with a little bit of the Medium Green to outline each of the leaves. Add a stroke down the center with a small round tip brush.
Finally it’s time to add some lettering! Dampen a filbert tip brush and dip it in the Toffee to paint a base coat on the letters that are in the navy stripes. This will create a base coat for when you paint the letters orange. Using the color Canyon Orange and a filbert tip brush, paint the lettering on your door hanger. Switching over to a round tip brush and Sable Brown paint, outline the contour lines of the pumpkin. Finally add some finishing details and outline lines to the door hanger by tracing the edge of the pumpkin, stem, and some leaves with a Black 3M Posca Paint Pen.

Paint the Give Thanks Door Hanger With Me
If you loved this Give Thanks door hanger tutorial and you’d like to catch the replay, you can find it on my YouTube channel. I also go live on my Facebook page every Tuesday and paint a new template that was released in my shop the week before. I’d love to chat and paint with you as I go live, I hope to see you there real soon!
Related Resources
- Want to make a simple bow to add to your door hanger? Here’s a blog post telling you how!
- Are you going to paint this adorable door hanger? Like my Facebook page and show off your finished door hanger on my Made It Monday post!
- Watch more tutorials on my YouTube Channel!


0 Comments