Supply List
- Spring Truck Template
- 1/2 inch flat tip brush
- one inch flat tip brush
- liner brush
- small round tip brush
- Graphite Paper
- Garden Flag
DecoArt Americana Paint Colors:
- Fabric Painting Medium
- Orange Flame
- Cinnamon Stick
- DecoArt SoSoft Fabric Acrylics- Lavender
- DecoArt SoSoft Fabric Acrylics- Bright Yellow
- DecoArt SoSoft Fabric Acrylics- Ocean Blue
- DecoArt SoSoft Fabric Acrylics- Italian Turquoise
- DecoArt SoSoft Fabric Acrylics- Bright Avocado
- DecoArt SoSoft Fabric Acrylics- Black
- DecoArt SoSoft Fabric Acrylics- White
- DecoArt SoSoft Fabric Acrylics- Fuschia
Note: Affiliate links included within this post for your convenience. As an Amazon Associate, I earn from qualifying purchases.

Getting Started on the Spring Truck Garden Flag
To get started you’re going to want to be sure that you grab the DecoArt Fabric Acrylic paints. These paints are made specifically for fabric, and the colors will remain bright and vibrant even after washing. If you’re wanting to grab some of these paints you may have to plan ahead and order online. I am unsure if all the stores carry these. You can shop my affiliate link and I’ll earn affiliate income if you choose to purchase directly from DecoArt.
Before you start tracing your template, it’s important to take the garden flag out of the package and iron it. Lay the graphite paper shiny side down on the garden flag, then lay the template on top of that. I printed this template in the twenty inch size. Using a ball point pen, trace the entire design. It’s important to make sure that the design doesn’t shift or move during this process or your lines won’t look good. Every now and then you will just need to carefully life the edge and change to make sure that you are marking hard enough.

Painting the Spring Truck Garden Flag
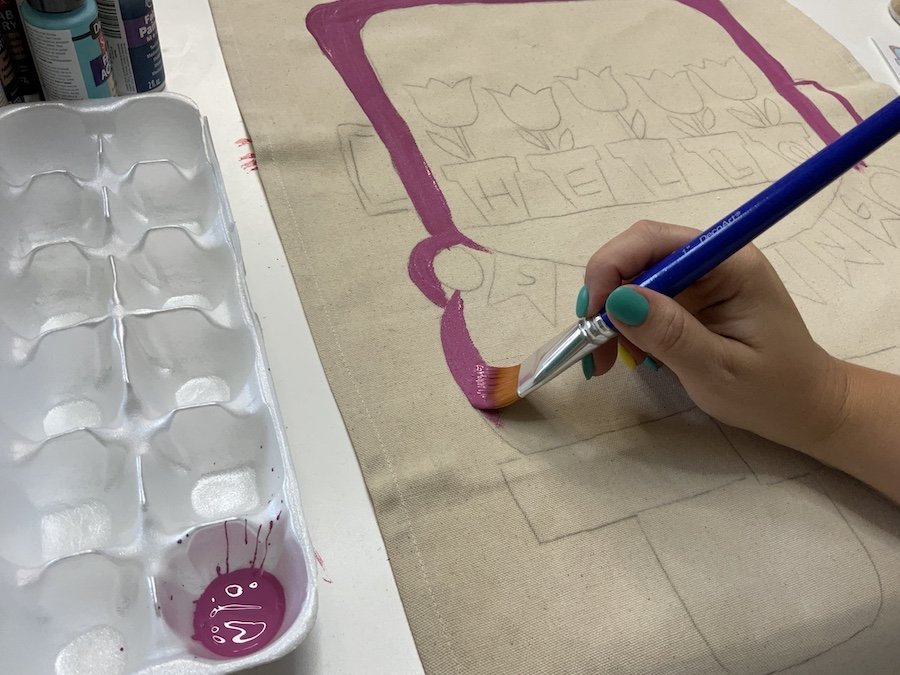
First you will use the Fuchsia and a large flat tip brush to paint the truck being sure to cover up the lines as you paint. Mix some black and white fabric paint to create gray so that you can paint the bumper of the truck using a half inch flat tip brush. Using black paint, start painting the tires of the truck. To paint the inside of the window, use the color Indian Turquoise. You’ll want to use this paint sparingly, because I mixed it with some white to make a lighter blue. You might want to switch to a smaller brush so that you can get around the pots and flowers in the truck window. Once you paint the window, be sure to use the same color to paint the truck mirrors too! Next, paint the license plate and the strings that hold the banner up using white paint and a small round tip brush. Finally, paint the tail lights using the color Bright Yellow.

Using Fabric Medium
The little pots on our template are a terra-cotta color but I don’t have a terra-cotta paint color in the Fabric Acrylics paints, so I used a fabric medium. You mix fabric medium in a two to one ratio – two parts paint to one part fabric painting medium. By using the fabric medium, you’re able to use regular craft paints on the fabric. I used the color Cinnamon Stick to paint the pots.
Paint the Flags and Tulips
The truck has the cutest little banner on it! I used the color lavender, yellow, bright avocado, ocean blue, a little white mixed with the pink from the truck, and Orange Flame mixed with a fabric medium. Be sure to paint your tulips a corresponding color as you have the paint for the flags on your brush! You might want to trace over the letters with a Sharpie before you paint so that you can see them through the paint. Finally, paint the stems and leaves of the flowers using the color Bright Avocado.

Let’s Add Lettering to the Spring Truck Garden Flag
Using a round tip brush, freehand a name or word on the license plate. I did Bennett, my last name in black paint. It would also be cute to write “Hello Spring” or “Happy Easter.” Next, switch to white paint and with a small round tip brush add the lettering to the pots and flags. Just be sure that the paint is dry first!
The Final Details
In order to make our design pop you guys know I love to add little whimsical details with black and white. I just used a tiny brush and added wiggle squiggles to my design. I added these little accents to the tire treads, bumper, windows, and even the pots and flowers! Once you’ve added your squiggly details, outline the details on your flag including around the window and edges of the design. Tada, the garden flag is complete! Look how cute! It’s a little time consuming, but it is so rewarding!

Catch the Replay
You can watch replays of my recent Facebook Lives either on my Facebook page or on YouTube! Catch this tutorial in the replay below. I’ve been sharing ways to use templates from my shop at www.shopdoorhangers.com and am really enjoying this series as a way to change up the typical door hangers that I paint. I hope you’ll join me, if you want a notification before I go live you can text “hey” to (270) 207-9091 and you will be added to my VIP list. It allows you to receive a text before I go live so that you don’t miss anything!
Related Resources
- Watch more videos and subscribe to my YouTube channel.
- Want some free templates to practice with before you purchase? Visit my FREE template library!
- Join Painter’s Clubhouse and learn how to paint alongside a wonderful community!


0 Comments