
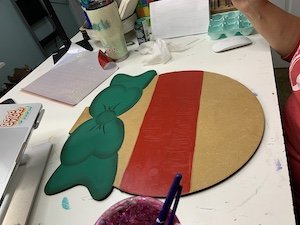
Use a Base Coat
When you’re adding foil to a door hanger, it’s good to add a base coat under where the foil will go. If your foil has a specific color, I recommend painting that color beneath where you will be layering your foil. This helps to prevent any wood from showing through your foil when your door hanger is complete. For a Christmas Ornament with foil I recently did, I painted red beneath where the red foil would be. For the leopard print foil however, I did not add a base coat. The natural color of the wood is perfect beneath the leopard print so I saved myself the extra work. My friend, Jennifer, paints black under all of her foils because it covers the imperfections.
Use a Good Foil Adhesive
I use foil adhesive that I purchased on Jennifer Ferguson’s website. It’s ArtsSyVille Foil Adhesive and it’s so important that you use this specific foil adhesive because it needs to dry sticky so that the foil will stick to it. This specific adhesive provides a good dry tack, and without it, your foil isn’t going to stick well.
Just a little tip when using foil adhesive, if it’s too thick you can add just a bit of water to it to thin it so that it is easier to apply. This foil adhesive goes on milky, but as it dries, it will go clear. I don’t recommend being frugal with your foil adhesive as you want to be sure that your foils will stick to the adhesive.
How Long to Let the Foil Adhesive Dry
When painting live recently with Jennifer, she recommends letting the adhesive dry on its own. She said she typically lets hers dry for about an hour. You can use a heat gun to speed up the process, however, when you go to remove the foil you realize that it’s not transferring well, you might need to let the adhesive dry a little longer.
On the other side of that, if you let your foil adhesive sit for a long time, you can even come back to it a day or week later to add your foil. Once the adhesive reaches that dry tack stage, it doesn’t lose its tack.
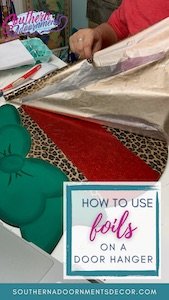
How to Apply Foil
Once the foil adhesive is dry, it’s time to apply the foil. Place the foil printed sign up on top of the adhesive. Using a small squeegee or card, start to transfer the foil to the surface. If you’re having trouble with transfer, you can also use a little brush or toothbrush to get down in the crevices for the transfer. Once it’s transferred it’s time for my favorite part – the peel and reveal!

Have a Large Spot that Didn’t Transfer?
If you do your big reveal and find that you have a spot that didn’t transfer the foil, you can reapply your foil adhesive to that spot. Allow plenty of time for your foil adhesive to dry as foiling before it is dry can cause the foil not to transfer. Once your foil adhesive is dry, then reapply and transfer your foil to that spot.

See How I Used Foil in a Christmas Ornament
I recently had the pleasure of painting a Christmas ornament door hanger and using foils with Jennifer Ferguson for one of my Tuesday Facebook Lives. Jennifer owns Artistic Paint Studio, and she is the Foil Queen! We painted and foiled the same ornament together, but were able to use different foil patterns so we came up with completely different finished products. It was so much fun!
Looking for a place to shop for foils and foil adhesive? Checkout my friend Jennifer’s shop, Artistic Paint Studio for a variety of beautiful foils and a high quality foil adhesive. I get all of my foils from her and she has great products. Be sure to check her out!


0 Comments