
Some of the links shared in this blog post are affiliate links. This means I make a small commission when you purchase through these links at no extra cost to you. All opinions and reviews shown are honest and my own. Thank you for supporting my small business!
Do you remember those vintage ceramic Christmas trees with the little light-up bulbs? Just about every grandma I knew had one sitting on a side table or the kitchen counter every holiday season — mine included!
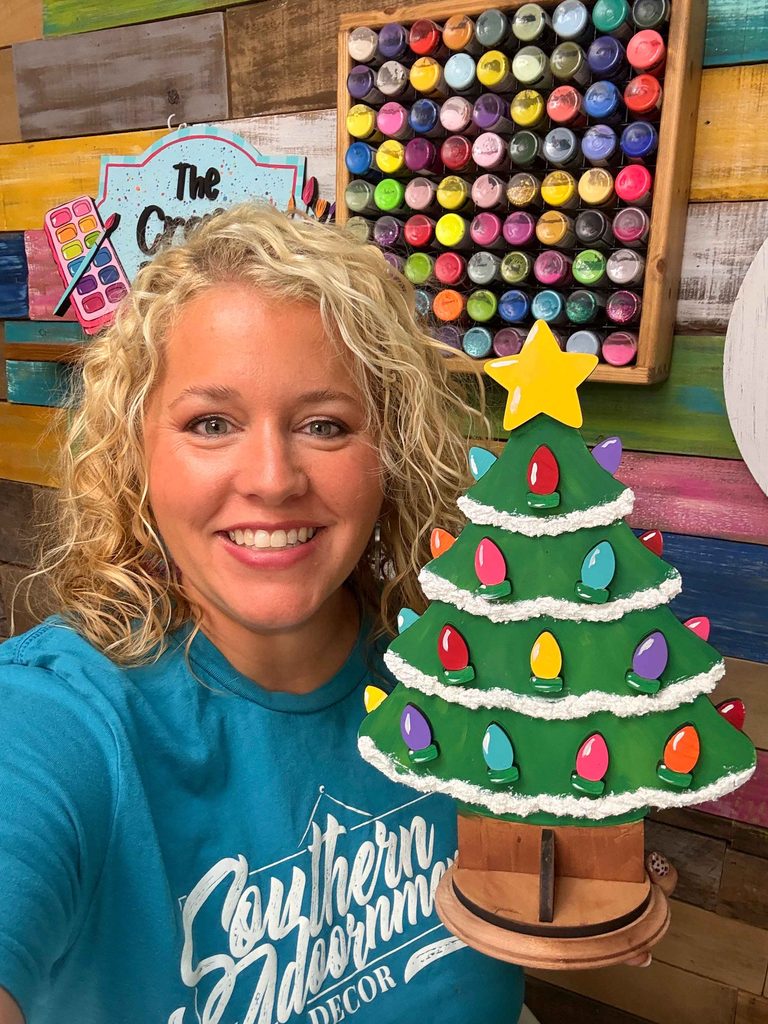
This wooden shelf sitter Christmas tree is my painted take on that classic, and it’s perfect for decorating this year. We’ve sold quite a few of these little kits, so I have a feeling y’all love them as much as I do!
Below, I’m sharing my favorite supplies, extra tips, and helpful resources so your tree turns out just as charming as the ones we grew up with.
What Supplies Do You Need to Paint a Vintage-Style Christmas Tree?
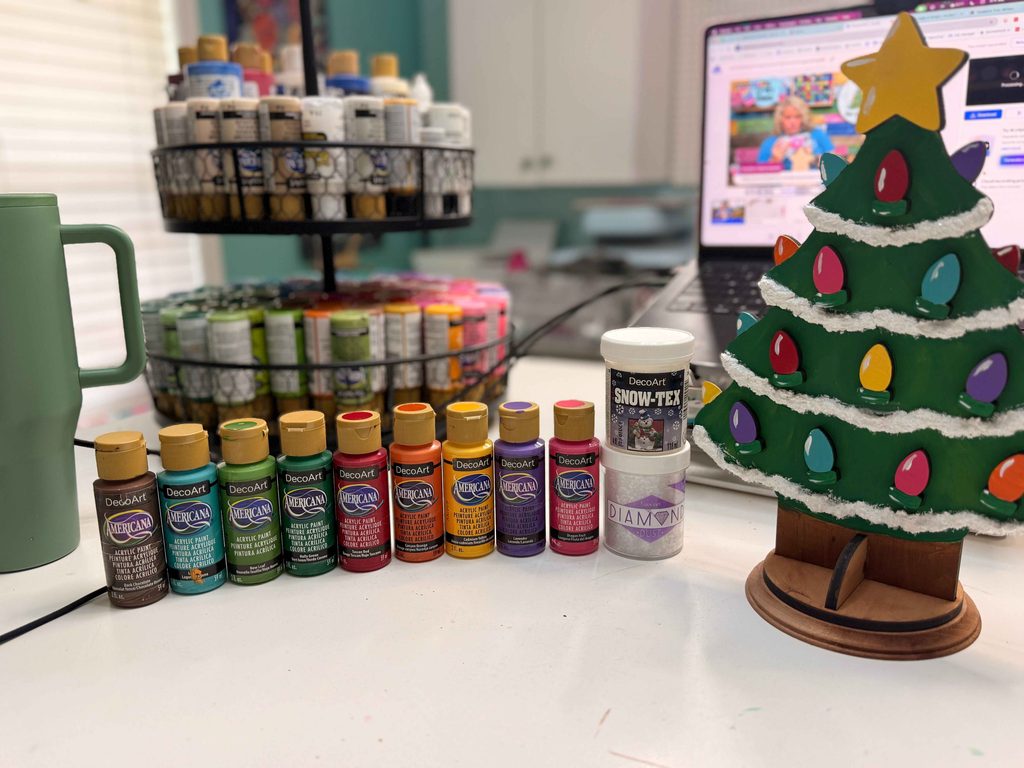
A vintage ceramic-style Christmas tree shelf sitter needs just a few basic painting supplies. Here’s what I used (you’ll find many of these in my Amazon shop):
- DecoArt Americana acrylic paints
- A ¼-inch flat brush and a small round brush
- Painter’s tape
- DecoArt Snow-Tex and a palette knife
- Diamond Dust glitter (I found mine at Hobby Lobby)
- Thick Stick Fast glue, baby wipes, a spray bottle of water, and a spray sealer
You can also purchase the blank for this specific design here.
New to painting on wood? Here’s a helpful list of the door hanger painting supplies beginners actually need.
#1: Use Two Greens for That Nostalgic Ceramic Look
The secret to making your tree look like real glazed ceramic is to avoid a flat, one-color green. I dip my brush into Holly Green and New Leaf at the same time and layer them while the paint is still wet.
Work in sections, adding more of the lighter green wherever you want a highlight. You can paint right over the light markings, too. Those just show you where to glue the lights.
And remember, this is whimsical painting. Your base coat doesn’t have to be perfect!
Want to feel more confident choosing colors that work together? Read my post on how to choose the right colors for your next project.
#2: “Stain” Your Wood Base With Watered-Down Paint
You don’t need real wood stain to get a stained look! For the stand, I water down Dark Chocolate paint so it soaks into the wood instead of sitting on top.
A few tips for a paint-stained finish:
- Dip your brush in water after the paint so it spreads further
- Mist your pieces lightly with water before painting (just don’t overdo it!)
- Wipe some of the paint off with a damp baby wipe, going with the wood grain
- Only paint the sides you’ll see. Pieces that stand upright need both sides painted.
Ever wonder why wood is such a great surface to paint on? Check out my post on painting on wood vs. canvas.
#3: Paint the Tiny Lights Without Painting Your Fingers
Those little lights are the cutest part, but they’re tiny and hard to hold. My favorite trick is to lay a strip of painter’s tape sticky side up and tape down each end. Then, set your lights on the tape so they stay put while you paint.
A few more tips for the lights:
- Paint the base of every light green first, then add the bulb colors
- Use two lights per color so no one color takes over
- Dry fit everything before gluing so you can see how it all looks
When placing your lights, avoid putting two of the same color side by side, and keep yellow bulbs away from the yellow star.
If you’re still building your painting confidence, you’ll love these 5 tips beginner painters wish they knew before they started.
#4: How Do You Cover a Paint Color That Isn’t Working?
Some colors, like Cadmium Yellow and Sunset Gold, can look a little transparent or darker than you expect. To fix this, mix a little white into your color for the first coat.
This gives you a buttery, opaque base, and then you can go over it with the pure color.
If you need to paint over a color completely, use gray or a tan that matches your wood as a primer. Gray works especially well under purples, pinks, and reds. It’s the same reason so many wall primers are gray!
Don’t love how something turned out? It’s just paint. You can always paint over it!
A paint swatch chart makes it SO much easier to know how your colors will look before you start. Here’s why every crafter needs a paint swatch chart.
#5: Snow-Tex Tips for Fluffy, Textured Snow
DecoArt Snow-Tex is a textured medium that creates raised, fluffy-looking snow. It’s the trickiest part of this project, so here’s what helps me most:
- Use the back of your palette knife, not the front. A plastic picnic knife works in a pinch, too.
- Scoop up just a little at a time and shape it into a small mound against the edge of the jar.
- Gently press and tap it into place one small section at a time.
- Drag the knife along the edge of the wood to help the Snow-Tex stick to the branch tips.
- If it feels dry and won’t stick, spritz a little water into the jar.
- Mop up stray bits with a damp paintbrush.
Snow-Tex has white paint mixed in, so it may leave a little white behind wherever it touches. I like how that looks around the snowy areas, but you can always touch it up with green.
Also, give yourself some extra time. This step took me about 15 minutes!
Want even more ways to use textured snow? Snow-Tex is one of the techniques in my post, 5 Easy Christmas Painting Tricks That Make Your Holiday Crafts Look Amazing.
#6: Add Sparkle and Whimsical Highlights
While the Snow-Tex is still wet, sprinkle Diamond Dust over it. Be generous! Gently tap it in with a paintbrush (not your fingers, so you don’t flatten the snow), then shake off the extra and pour it back into the container.
To finish, add a few little white highlights with a round brush on the star and on the left side of each light. If your hand shakes, that’s okay. It just makes it look even more whimsical!
Love adding little extras to your projects? Here’s how to find the best embellishments at Hobby Lobby.
How Should You Store a Painted Christmas Shelf Sitter?
For easier, long-term storage, don’t glue the tree into the stand. It holds just fine on its own, and you can pop it out after the holidays so it stores flat.
I also recommend a coat of spray sealer. It protects your paint from scuffs, especially if your decorations spend the off-season in the attic like mine do.
Make It a Thanksgiving Weekend Tradition
This little tree comes together so quickly, making it the perfect project to paint with your kids, sisters, or grandma over Thanksgiving weekend. While everyone else is watching football (or dozing off after all that turkey), you’ll be making memories AND a keepsake.
Looking for Your Next Christmas Project?
Find wooden blanks, kits, and holiday deals at shopdoorhangers.com. Want to keep learning alongside other women who love to craft? Come join us in the Painter’s Clubhouse! This is my monthly painting group, open to anyone of any skill level, where we make more projects like the one here!

0 Comments