")
One of the hardest parts about making door hangers? Knowing how to layer your paint…and well.
This is where many people get frustrated on their projects — they spend hours painting around small details of the design, or maybe aren’t sure how to get a color to show up without wasting 50 layers of paint.
And of course, if you’re frustrated, you’re probably not having fun.
The good news? There’s a much better way to do this!
In this post, we’ll cover three examples, all with varying levels of difficulty, so you can see exactly how to paint your door hangers in layers (and make painting fun again!).
Ready? Let’s dig in!
Paint your door hanger in layers: Example #1
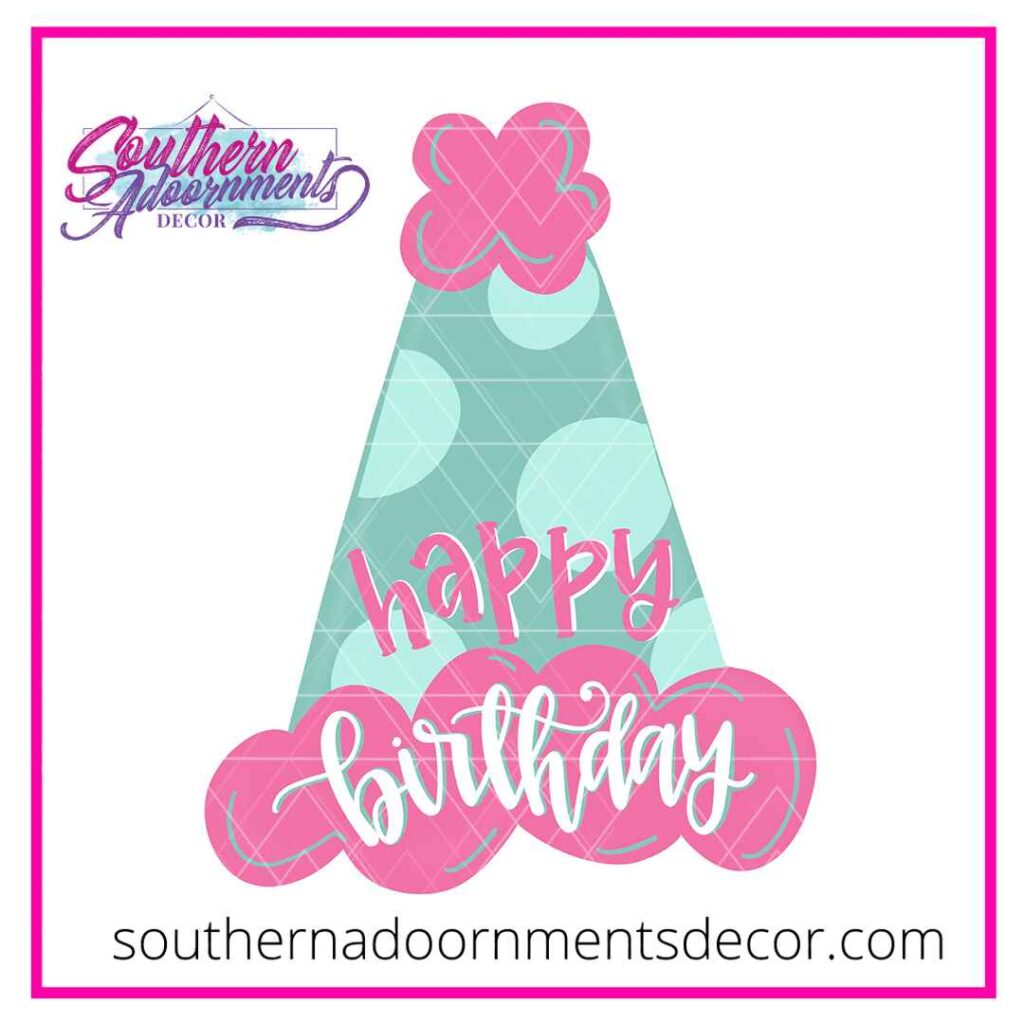
The most important thing to remember is to paint the biggest piece first. That’s usually the background, but if you have a design with many large surface areas, the rule still applies!
In the birthday hat example here, those large areas are the white, teal, and pink backgrounds. I sectioned off each portion, painted them, and then moved on to the polka dots on top.
But instead of painting around the polka dots, I used white as a base and painted them on top. This helped the colors really stand out, and made the process super simple!
Then, it was on to the finishing touches, like the hand lettering and splatter paint!
Want to practice these tips on this birthday hat? Grab the blank, template, and video tutorial here!
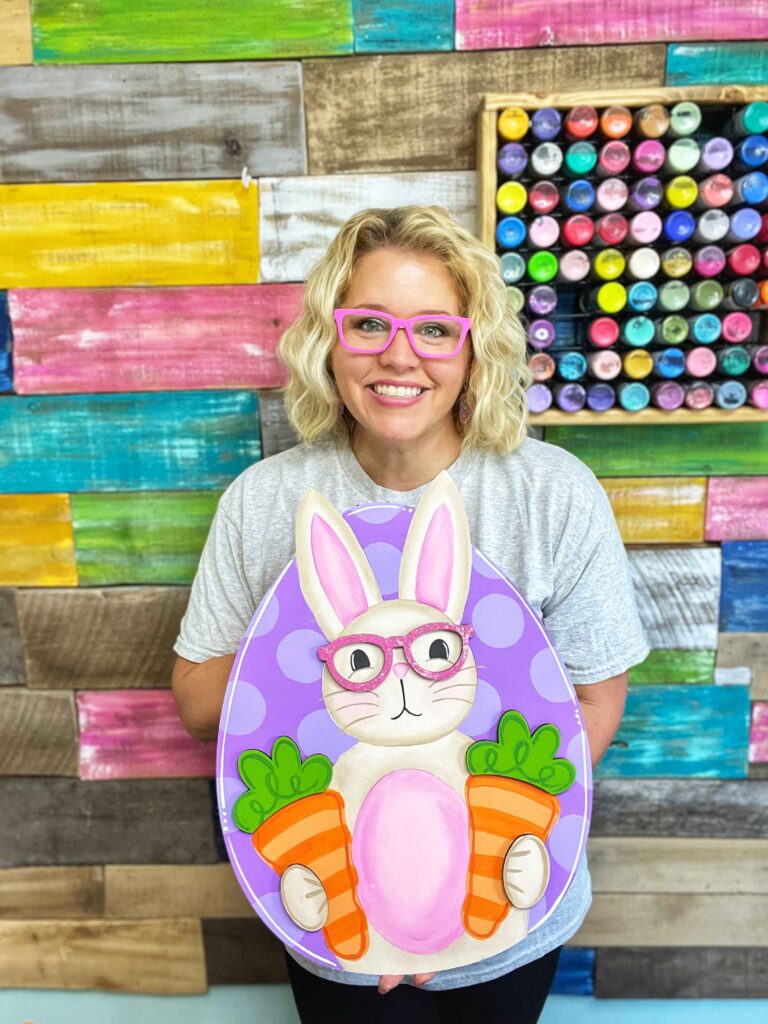
Paint your door hanger in layers: Example #2
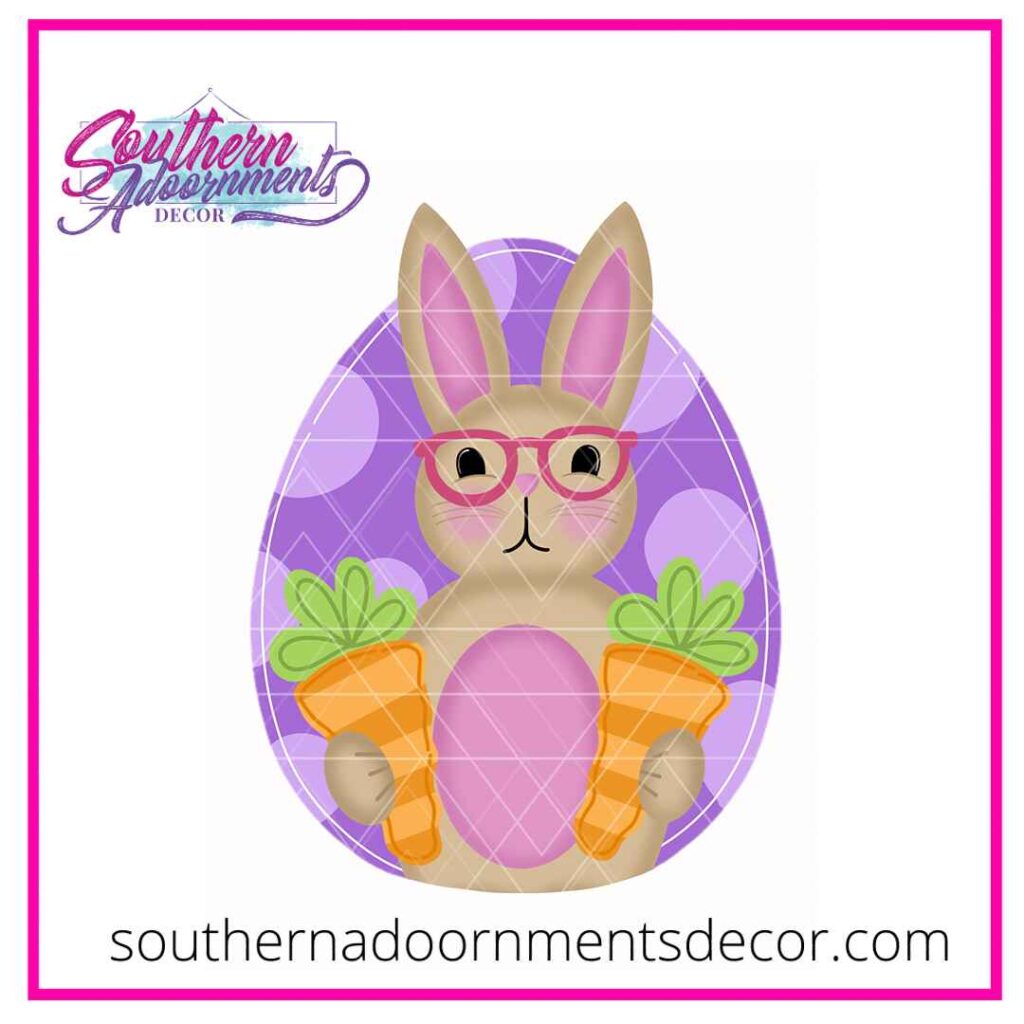
Since the bunny and the background of the egg take up a lot of space, I painted those first.
However, the way the polka dots blend into the background adds an extra layer of difficulty. And with such a stark contrast between the purple and the color of the bunny, I had to get creative here!
So, I painted the background first, being extra careful to paint inside the lines. Then, I took my round sponge pouncer to make the polka dots with a lighter color. I normally wouldn’t do the dots first, but because these blend into the background and have a lighter color, I knew I could paint over anything that got inside the outline of the bunny!
For the carrots, I already knew that the color I wanted to use was a bit transparent. So to keep the color vibrant, I mixed it with white and painted the full carrot. Then, because the background was already lighter, I used the original version for the stripes!
Want to create this door hanger? Grab the blank, template, and video tutorial here!
Paint your door hanger in layers: Example #3
What if you have a really dark background — like black or navy blue — and you’re not sure how to layer it with lighter colors? The fix is a lot easier than you think!
In the example above, this was easy to pull off because the wood blank already had the design lines etched into it. The outlines were easy to see, so I painted the base coat and then color-blocked the flowers.
After adding a few layers of white (and waiting for it to dry), I applied the actual colors on top!
But what do you do if you don’t have a wood blank with an etched design or access to a laser-cutting machine?
You can use a piece of white graphite paper!
Paint your background first, then place your graphite paper on the door hanger, followed by your template. Then, trace your design, and you’ll see the white outline on top of your base coat!
The door hanger design you see here isn’t available in our shop because it was a project we worked on inside the Painter’s Clubhouse. However, you can join us to get access to many more projects like it! Learn more here!
Get more door hanger tips here!
Ultimately, you want to focus on answering these questions when painting your door hangers in layers:
- What colors do I want to use?
- Will those colors stack well on top of each other?
- Will the colors I’m using be too transparent?
- Will I need to use white to make them pop more?
When you know the answer to these, the process becomes a whole lot easier! With a little bit of practice (and plenty of baby wipes on hand to help erase mistakes!), you’ll be on your way to effortlessly paint door hangers in no time!
Want even more tips and how-to’s like the ones I showed you in this post? Be sure to grab my Beginner’s Guide to Door Hangers mini-course here! I cover everything — from painting to hand lettering to what tools you can use to cut out your own blanks, and so much more!
(Psssst…it’s FREE! Even better right?)

0 Comments