Supply List
- Easter Egg Template OR Easter Egg Blank
- 1.5 inch flat tip brush
- Small round tip brush
- Small filbert tip brush
- White Chalk
- Pink Posca Paint Pen
- White Posca Paint Pen
DecoArt Americana Paint Colors:
Note: Affiliate links included within this post for your convenience. As an Amazon Associate, I earn from qualifying purchases.

Grab the Supplies for the Zebra Easter Egg Door Hanger
Before we get started, be sure to grab all of your supplies. I have the Easter egg wooden blank and the digital cut file and template available in my shop. Order the wooden blank to be shipped right to your door so it’s ready to paint. If you have the tools to cut your own door hanger, grab the digital cut file and template. Not sure what you need to cut a door hanger? Check out my blog post that features affordable ways to cut a door hanger.
Painting the Ombré Background on the Zebra Easter Egg Door Hanger
Now that you know what supplies you need I’m going to dive right in on painting that ombré background. First, I’m going to grab a 1.5 inch flat tip brush and paint the background using the color Laguna about one-third of the way down the egg. After rinsing my brush, I paint the bottom half of the egg using the color Peony Pink. Once complete, I have a large, non-painted space in the middle of my door hanger. This is where the ombré effect will come in. Using the pink and laguna on my paintbrush, I start at the bottom of the laguna and start painting down the door hanger. As I move down, I add more pink to help blend it into the pink. As I move up, I add some laguna to help blend the pink and laguna. This might sound confusing, but I just keep working with it until it feels well blended and is purple in the middle. It doesn’t have to be perfect because it will be covered by the zebra pattern!

Adding the Zebra Stripes and Stars to the Zebra Easter Egg Door Hanger
Now that I have my ombré background it’s time to add my zebra stripes and stars. Using chalk, I create some waved lines on the egg to create the zebra print pattern. I, then, connect the wavy lines and color them in with chalk. Next, I water down the black paint and us a small round tip brush to paint the zebra stripes. Using white paint, I paint the stars. This white background will help the yellow stars to pop. Once the white paint is dry, I use the color, Sunshine Yellow, to paint over the white background of the stars.

Adding the Final Details
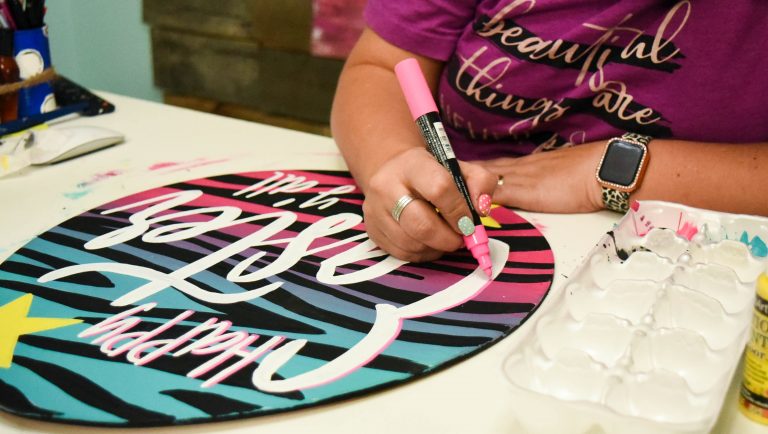
Now that the design of the zebra print Easter egg door hanger is complete, it’s time to add the lettering. Using a small filbert tip brush and white paint, I start to trace the lettering on my door hanger. Since this ombré zebra print Easter egg is so bright, I decided to add a drop shadow to the bottom left side of each letter using a bright pink Posca paint pen. Finally, I reach for a white Posca Paint Pen to outline the outer edge of the door hanger and then my masterpiece is complete! This fun zebra print Easter egg door hanger is a wonderful addition to your decor this Easter!

Catch the Replay
I hope you have enjoyed following along with me for this fun twist on an Easter egg tutorial. You can watch replays of my Facebook Lives either on my Facebook page or on YouTube! Be sure to catch my tutorial for this door hanger in the replay below. If you’re looking for a more detailed tutorial on how to create the ombré effect, be sure to check out my Free Library. It features a variety of free templates and tutorials to help you get started painting door hangers. There is an ombré technique tutorial in the free library that will help you perfect your new craft. When you’re done head to my Facebook page and share your latest project with me on my Made it Monday post!
Related Resources
- Want to practice on free templates? Visit my FREE library and get access to free templates and tutorials!
- Join my Painter’s Clubhouse Membership and learn more techniques just like this one!
- Subscribe to my YouTube channel!


0 Comments